|
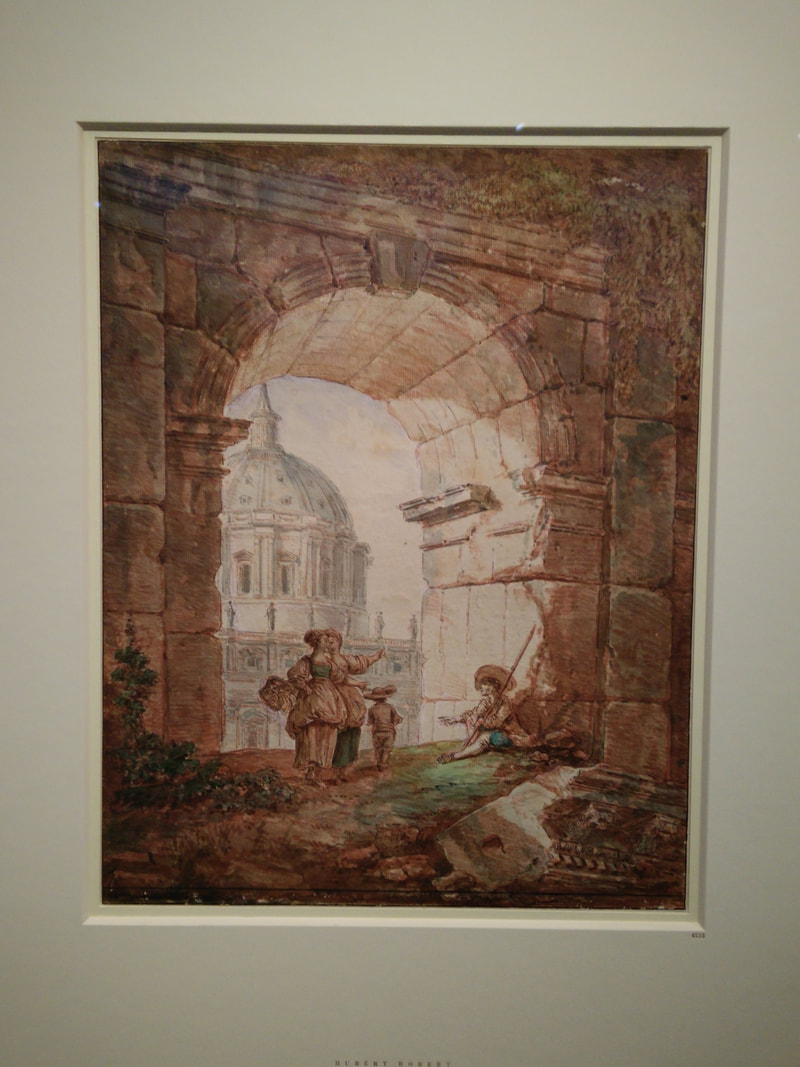
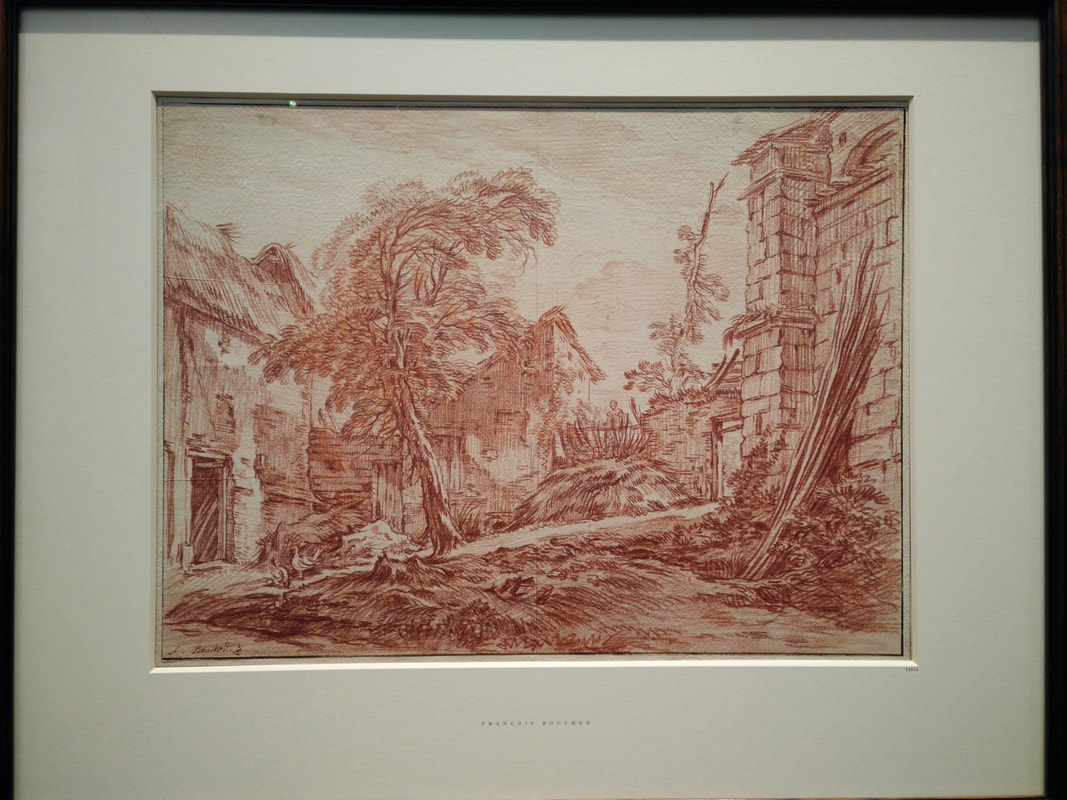
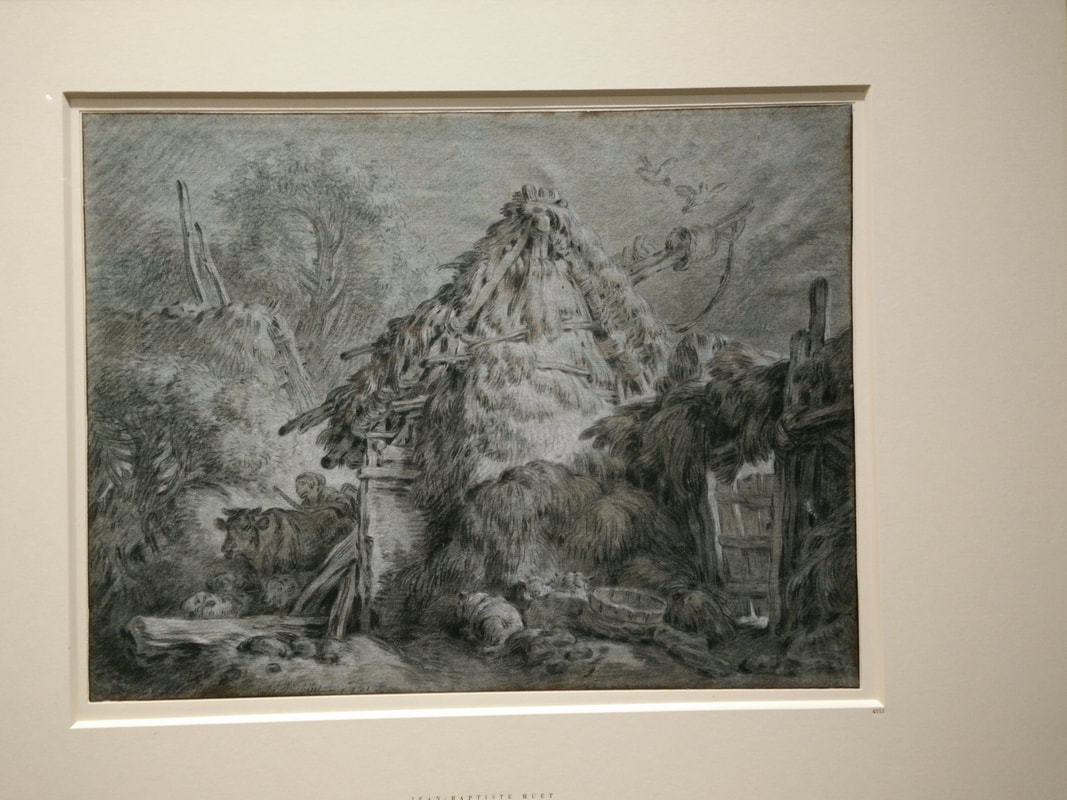
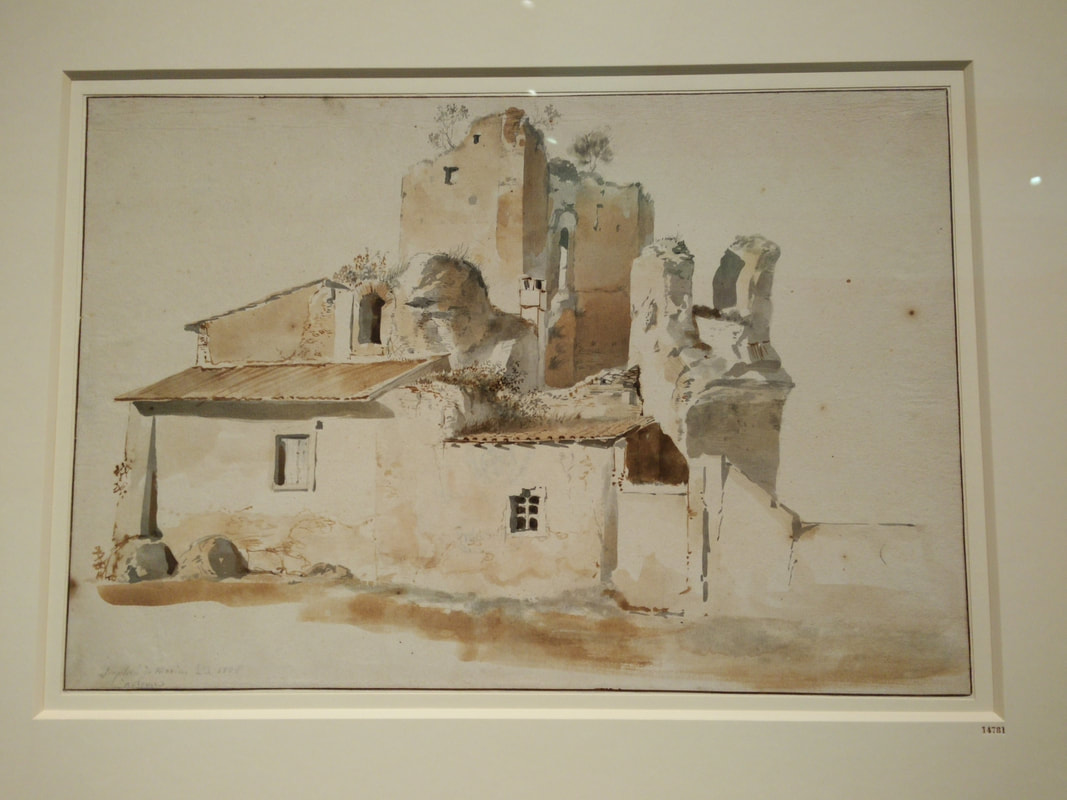
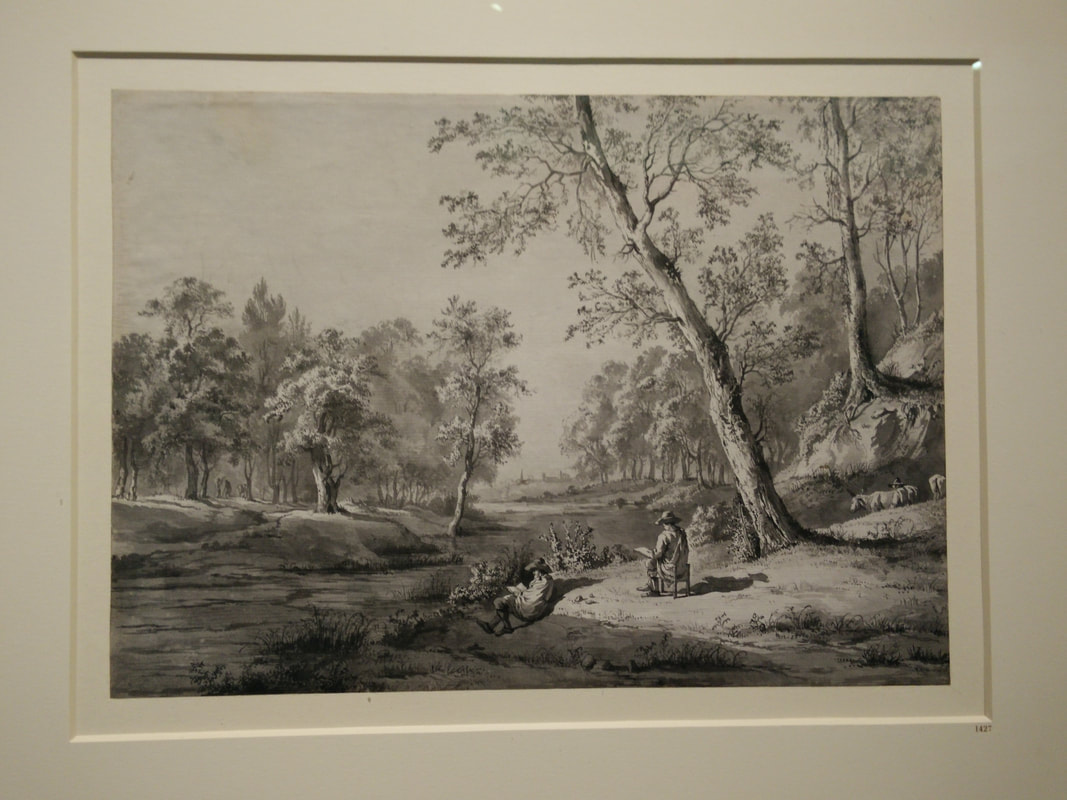
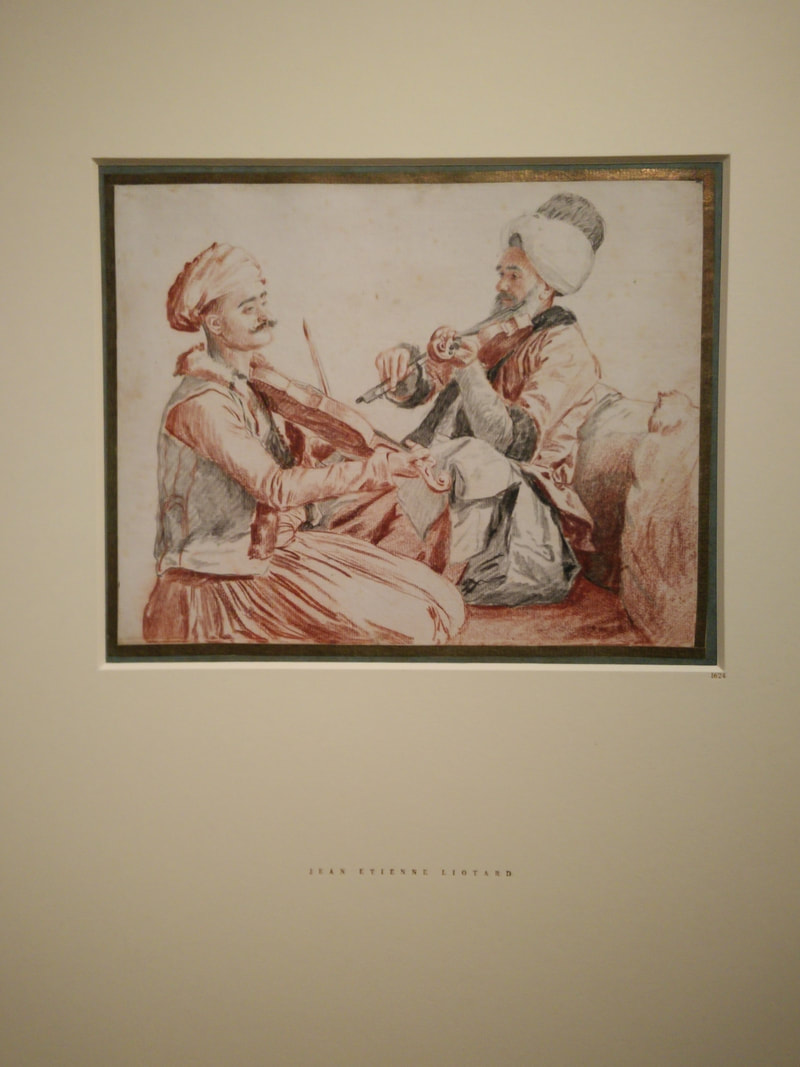
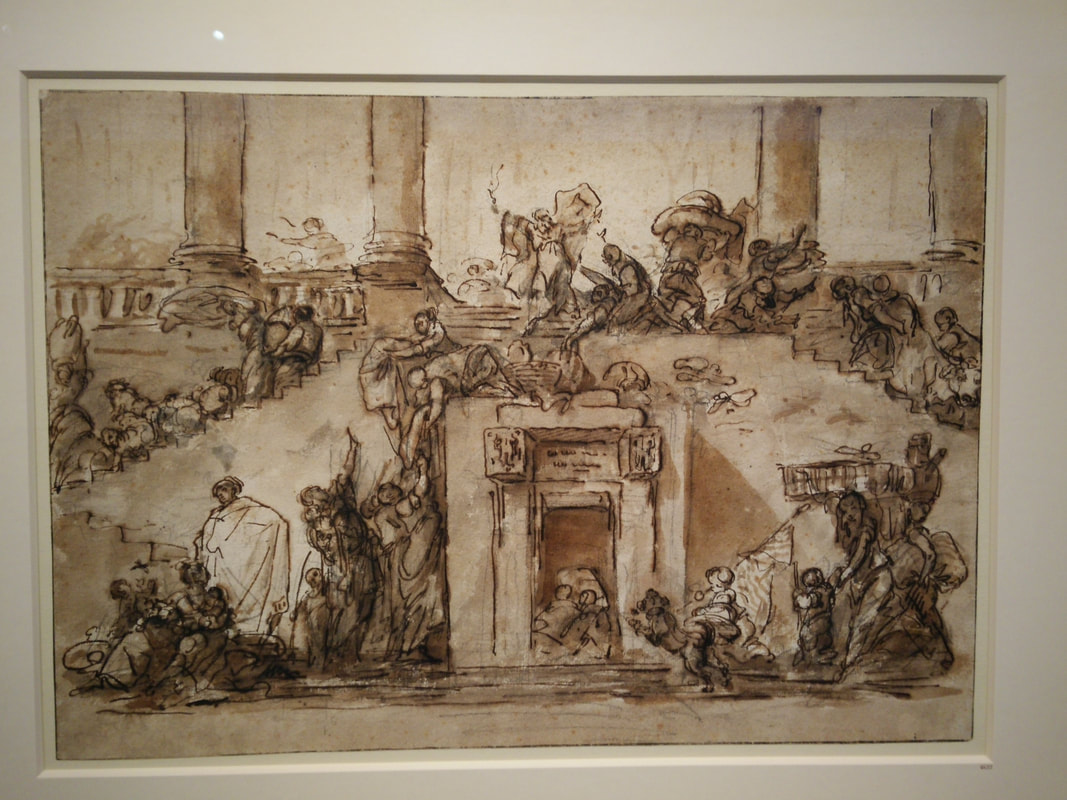
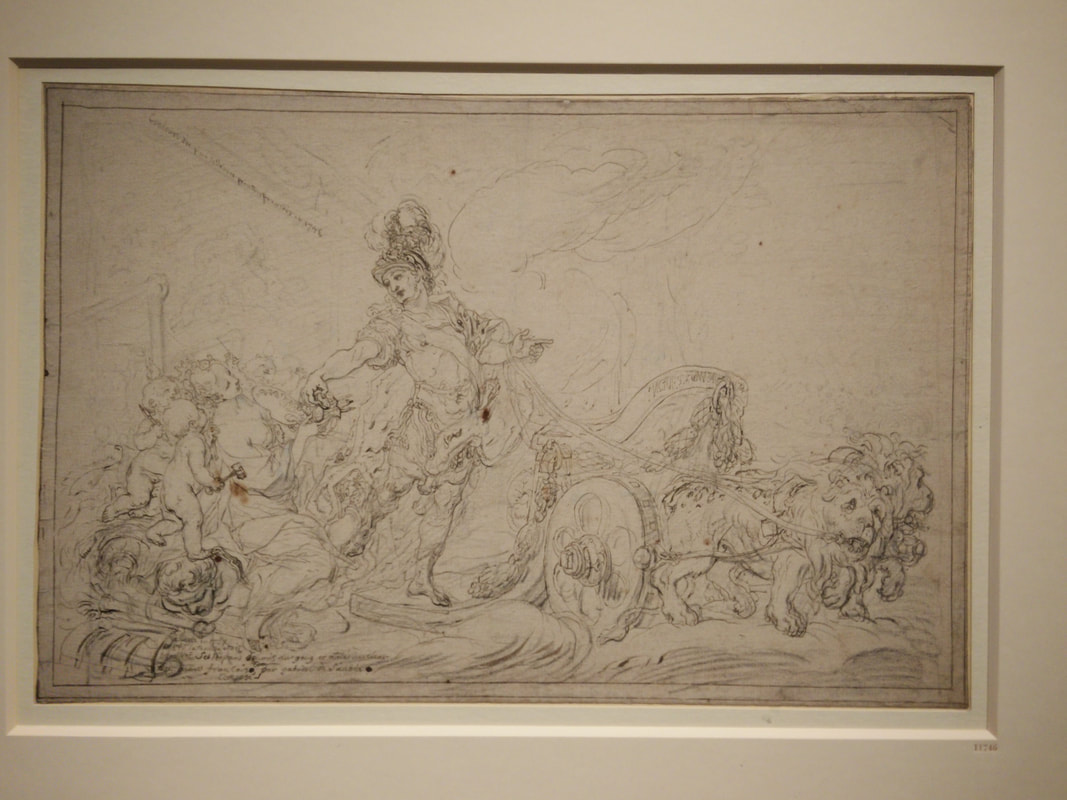
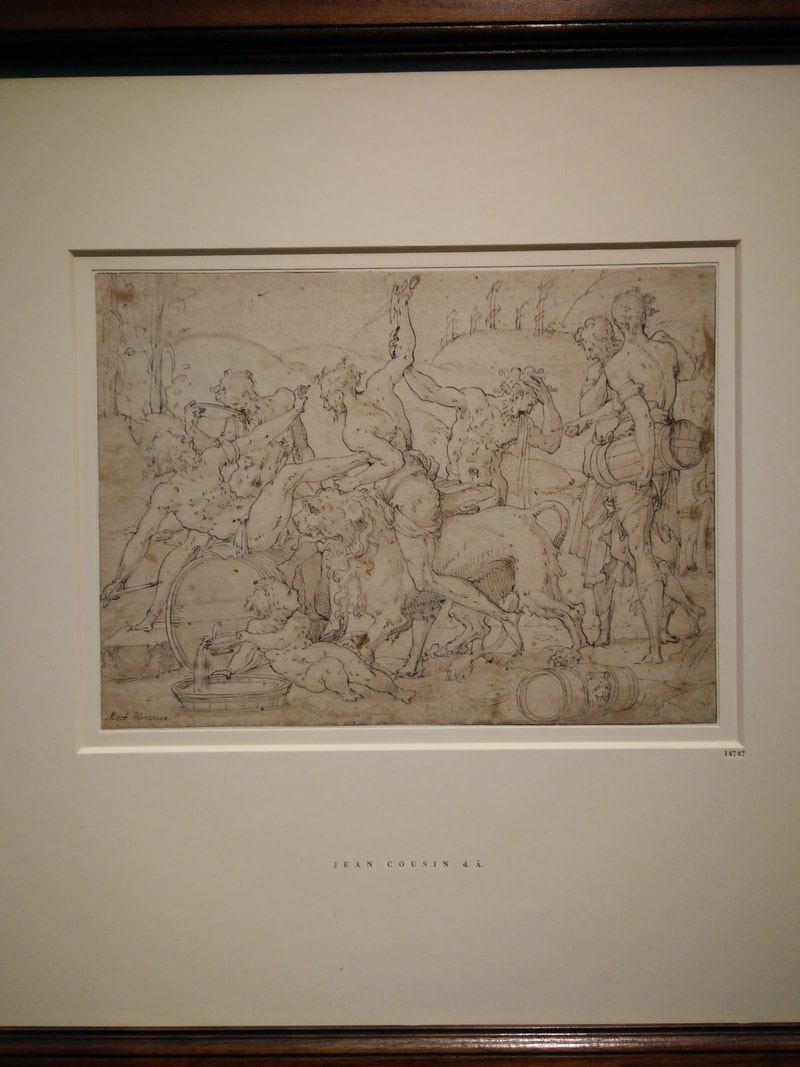
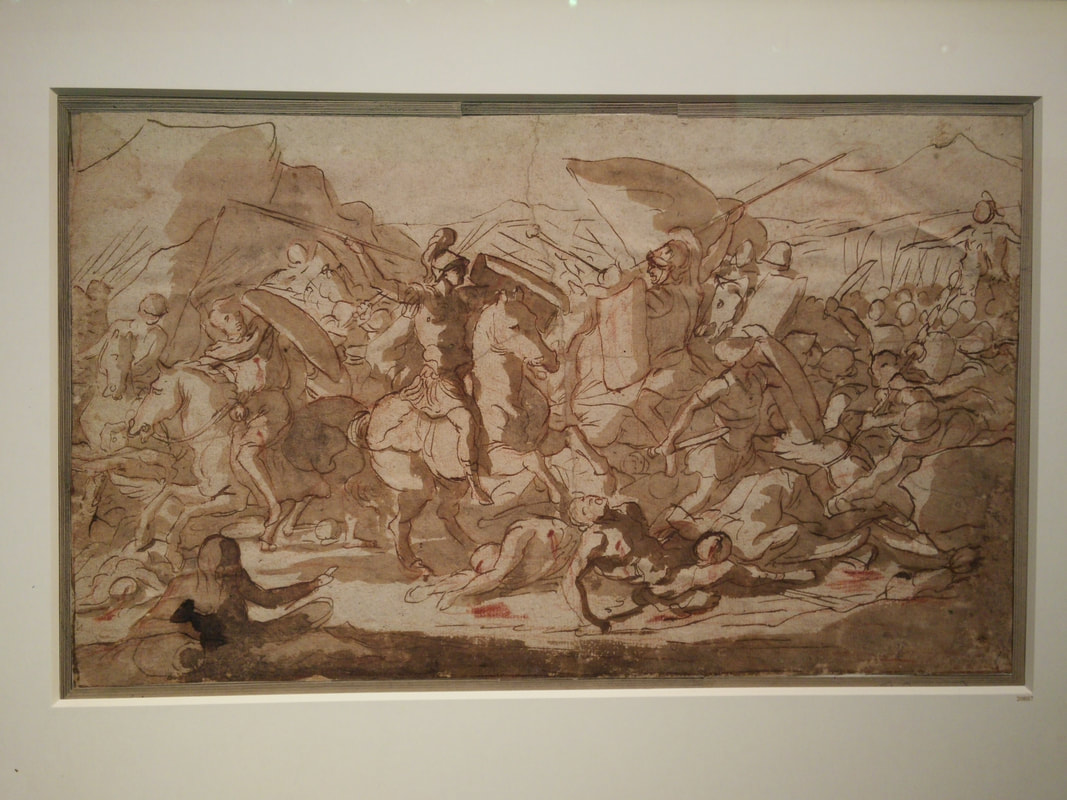
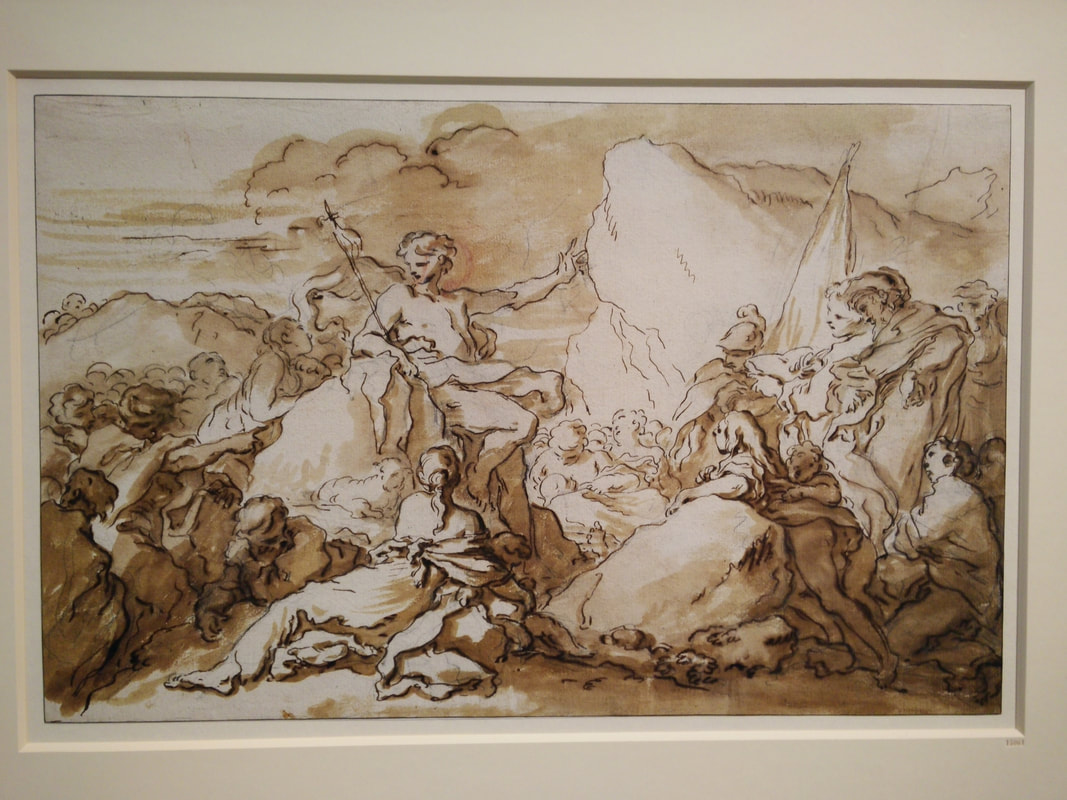
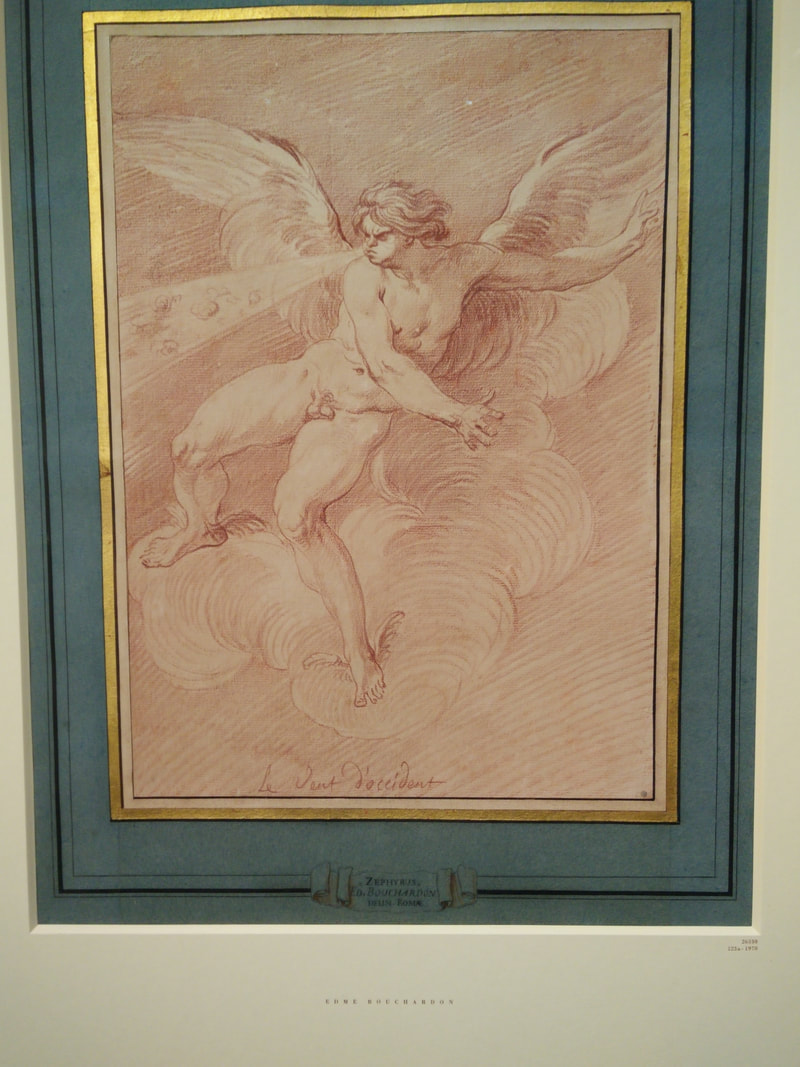
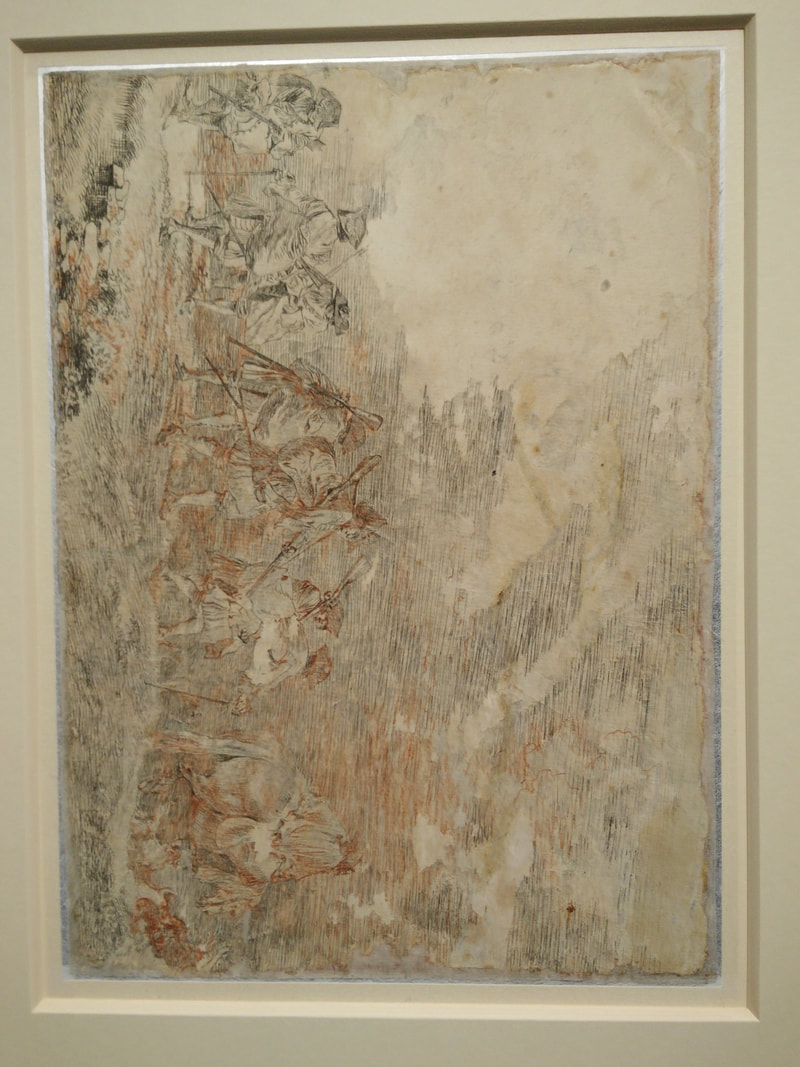
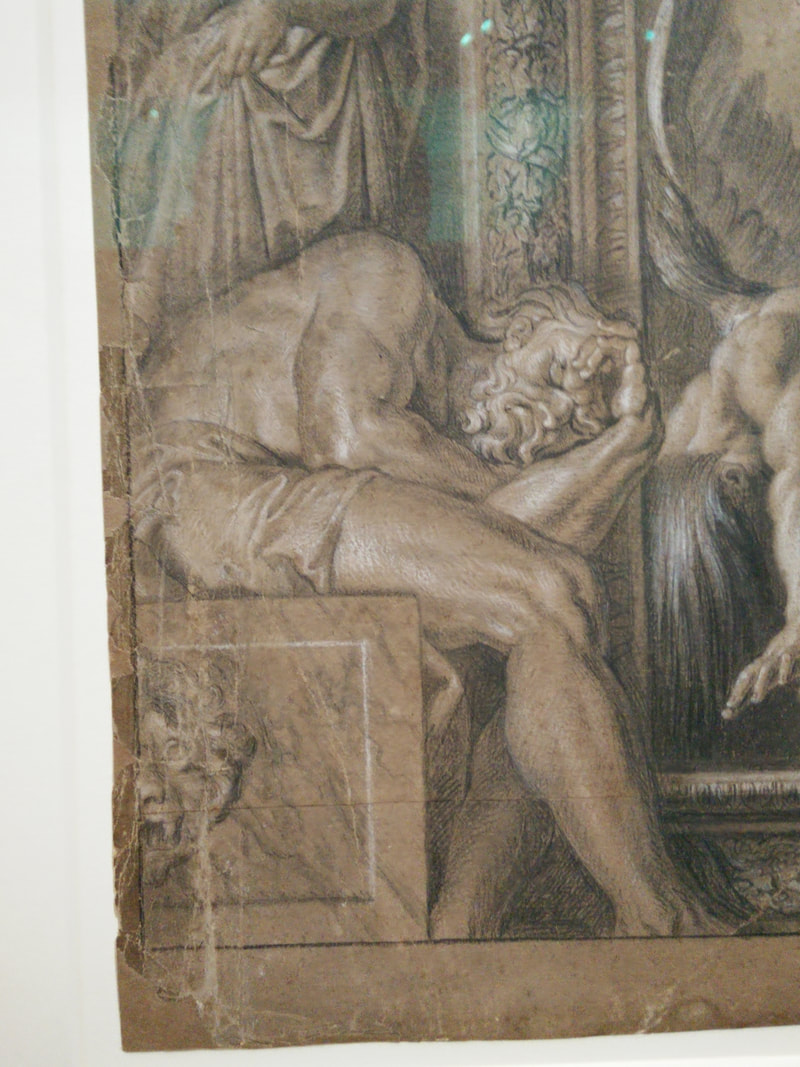
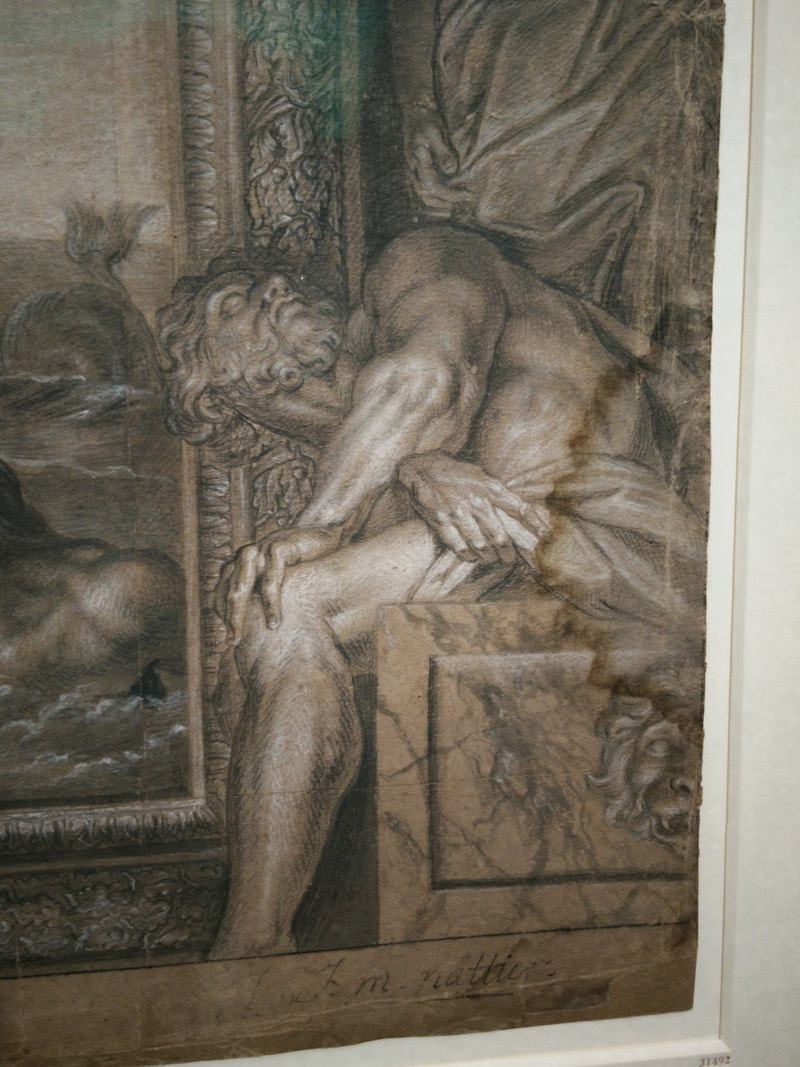
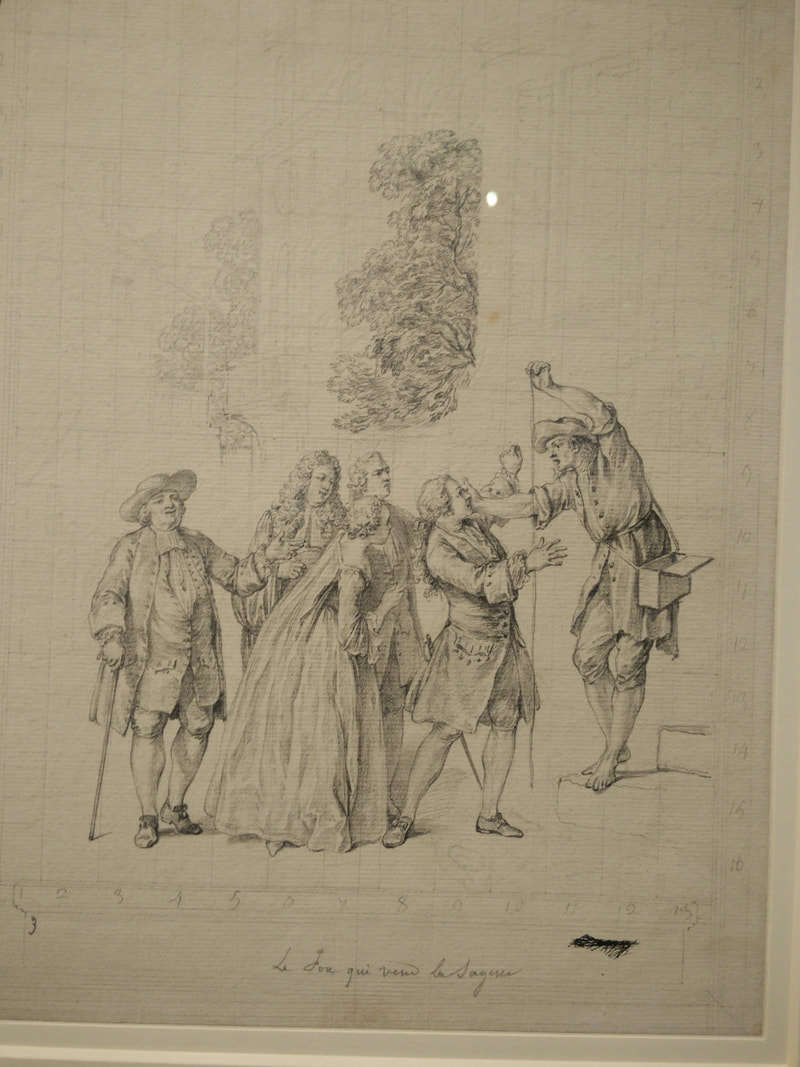
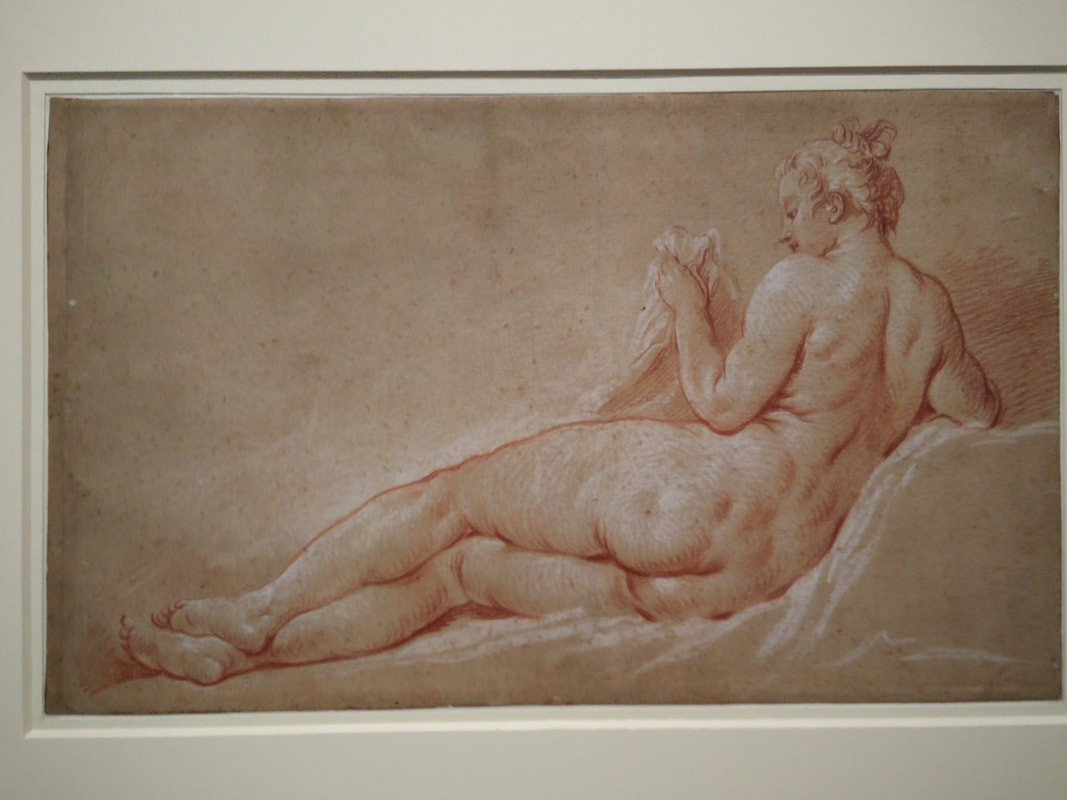
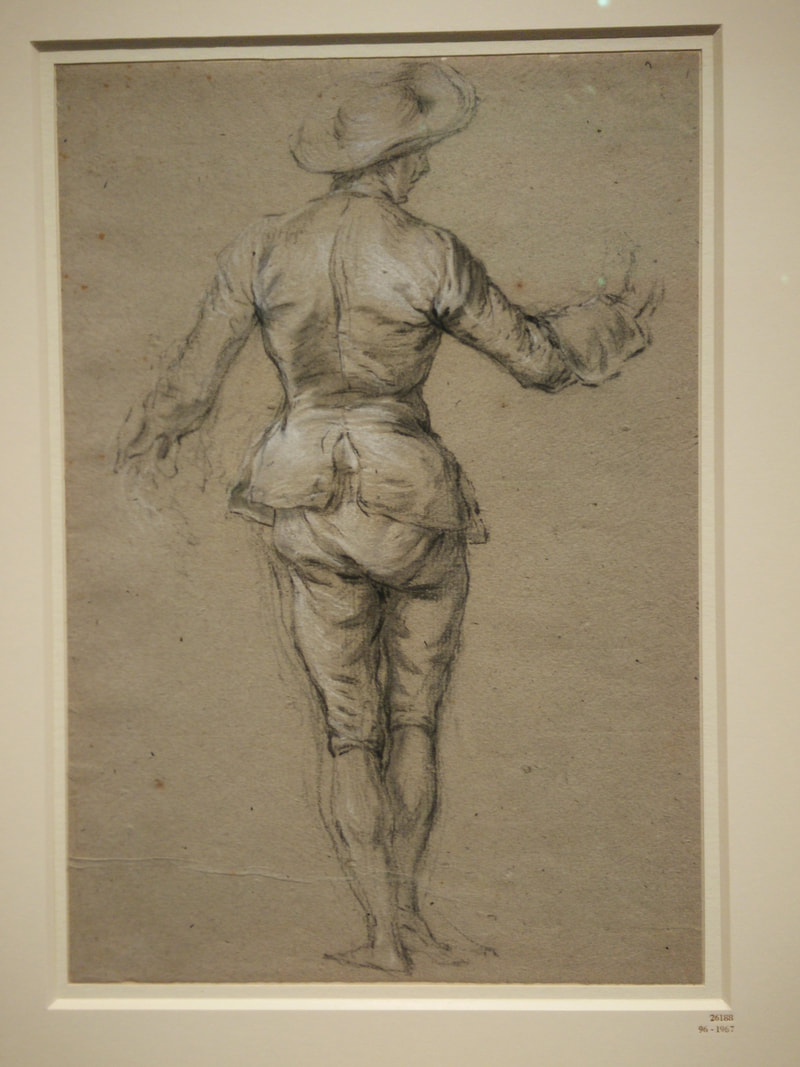
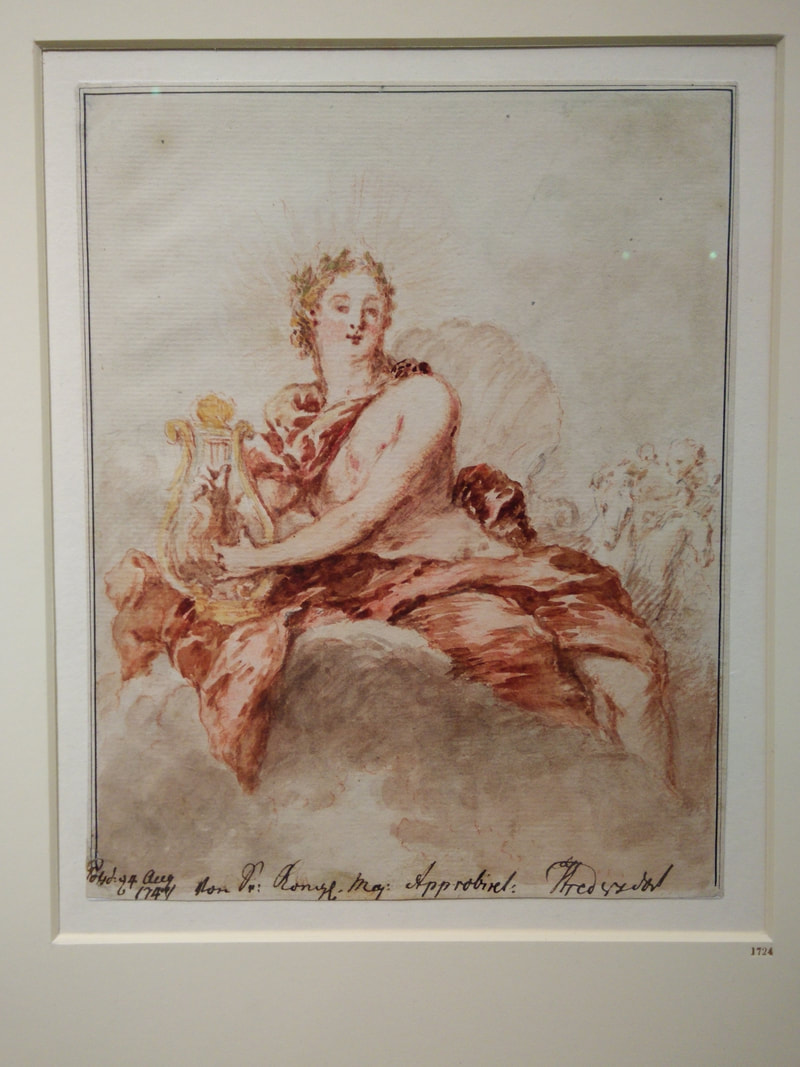
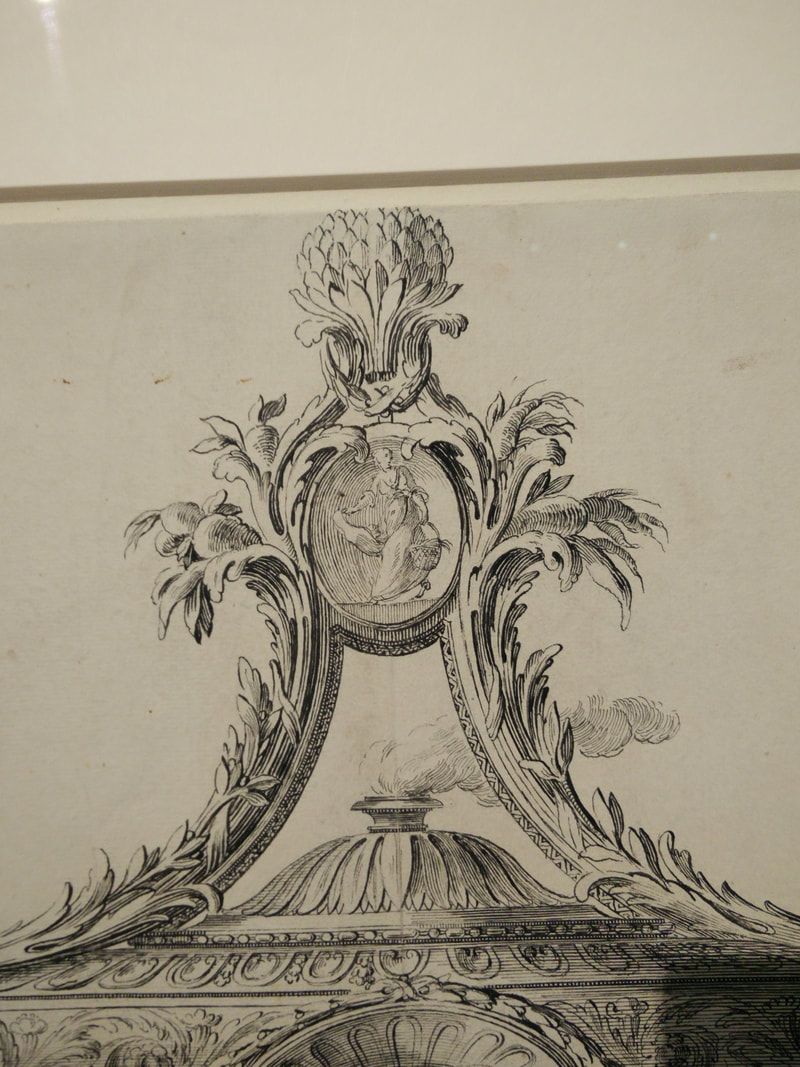
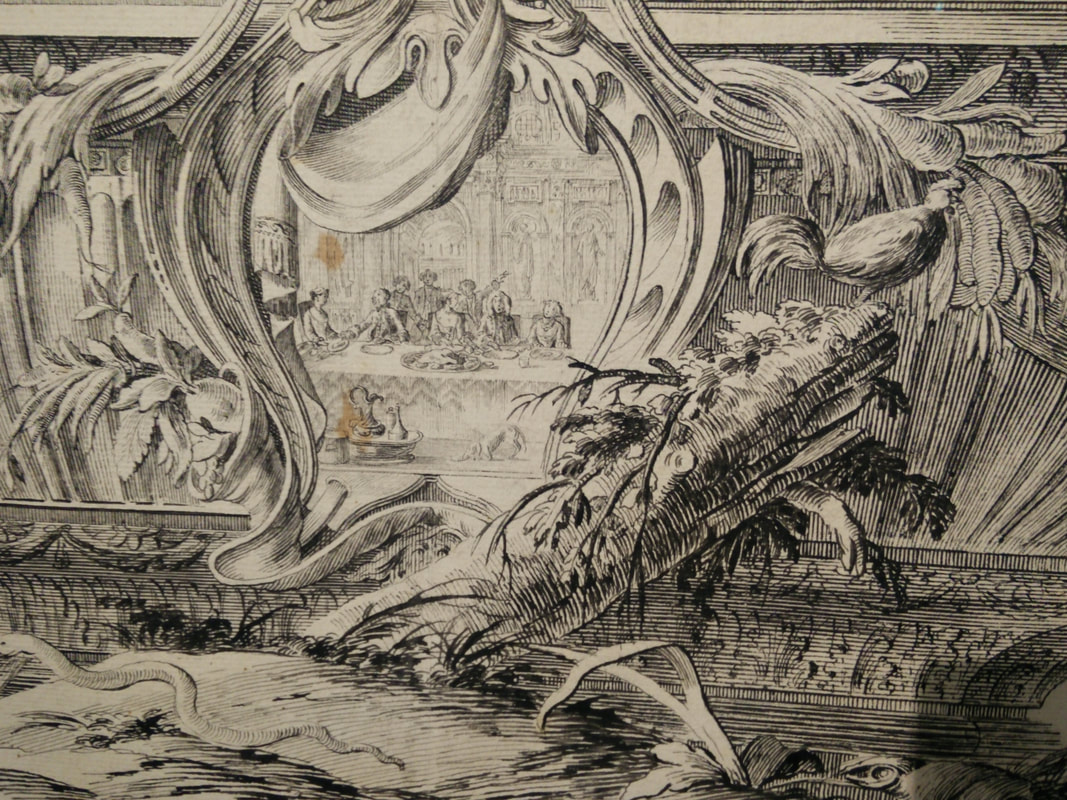
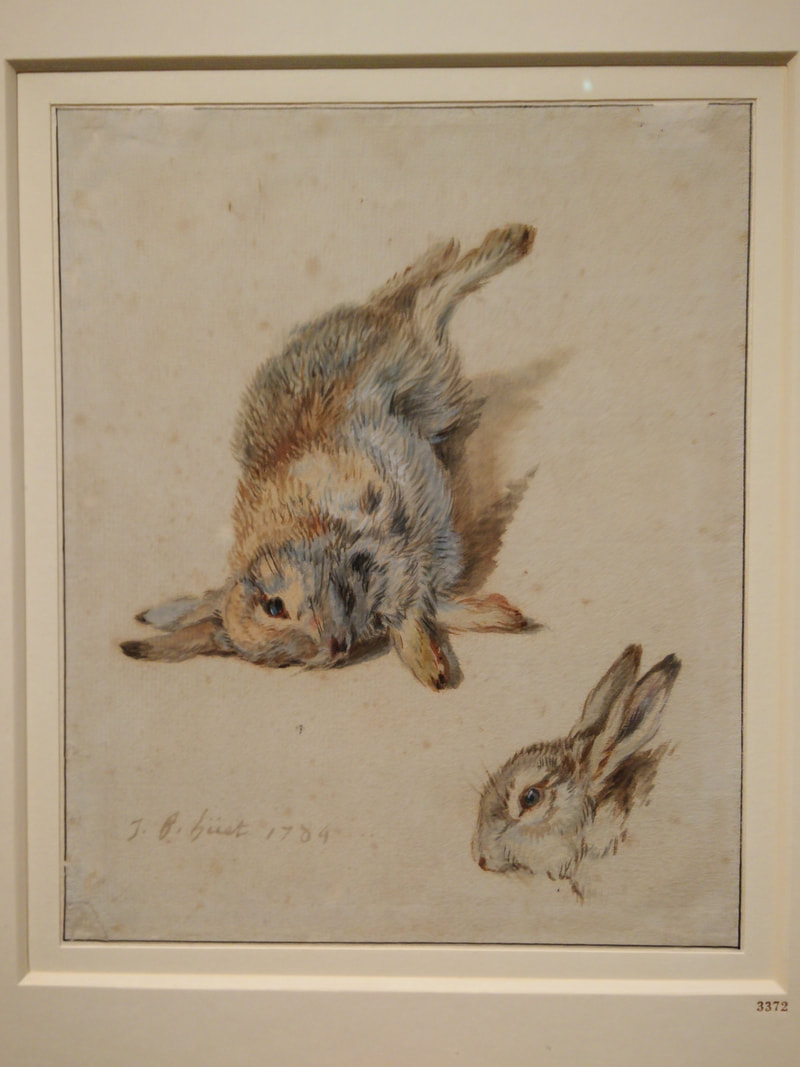
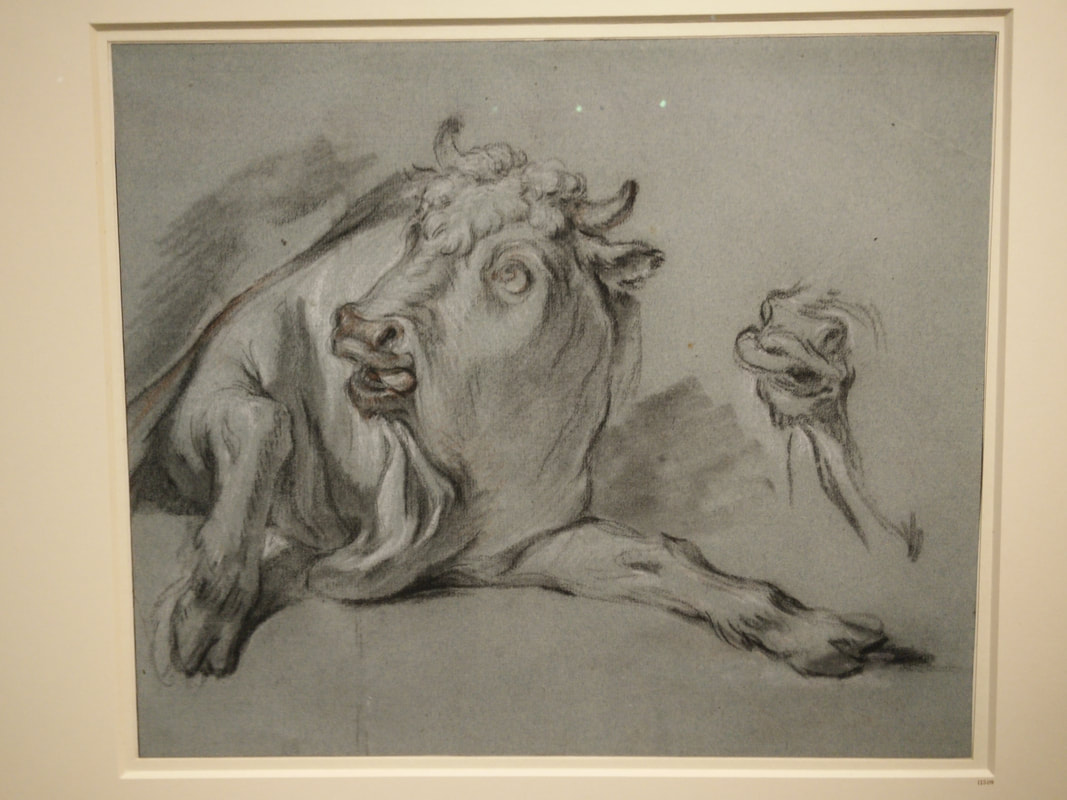
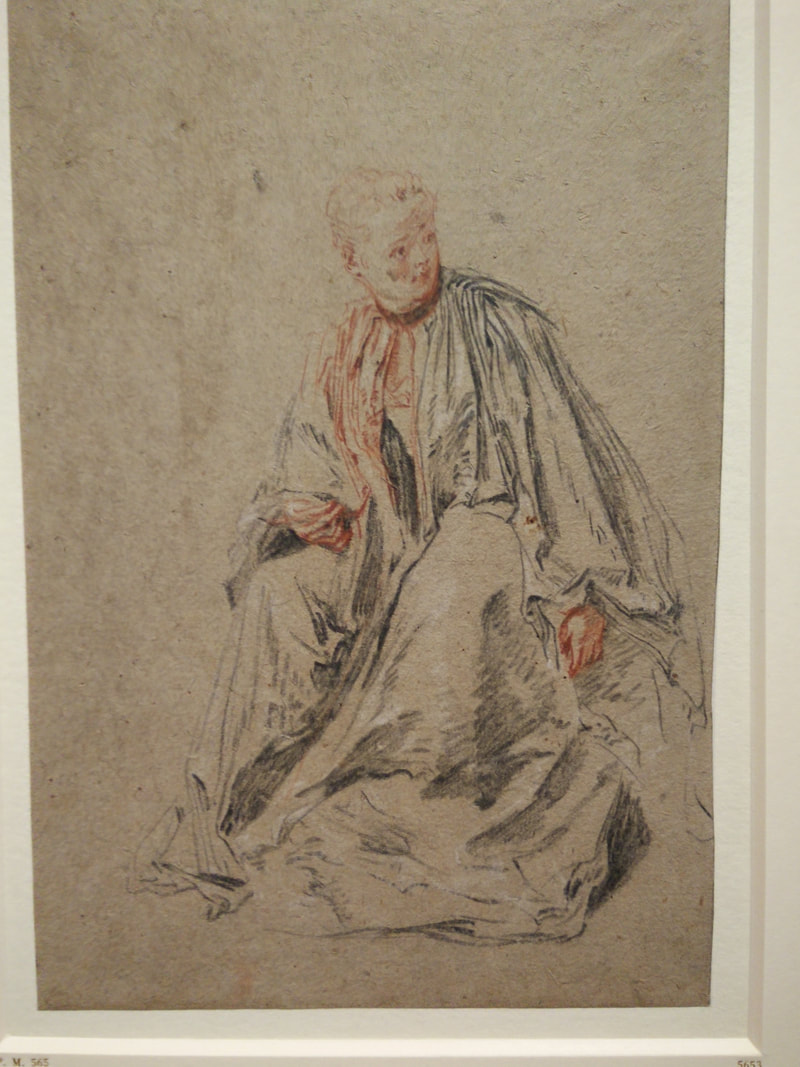
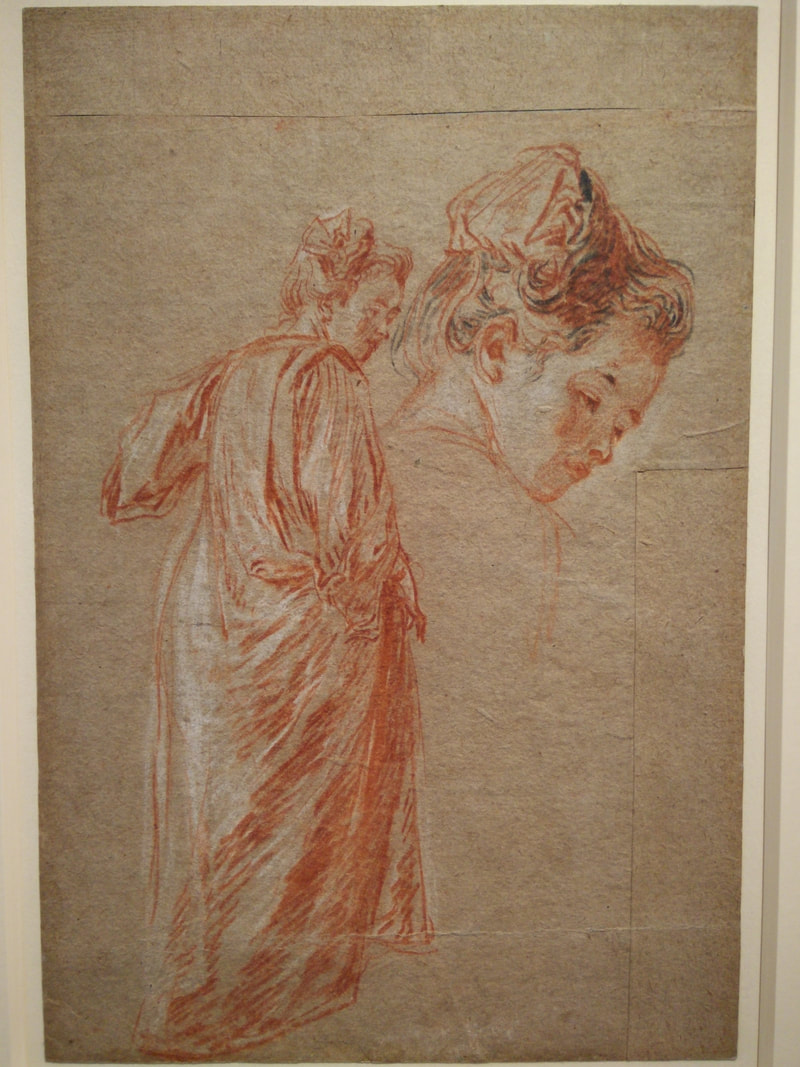
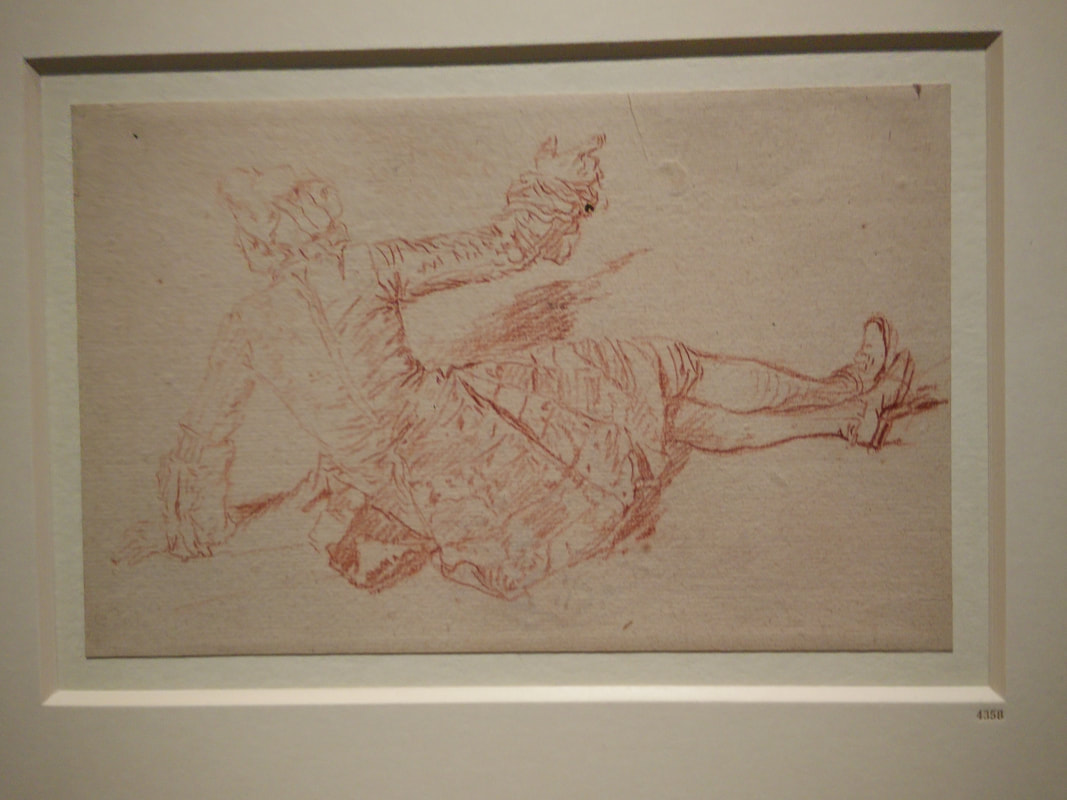
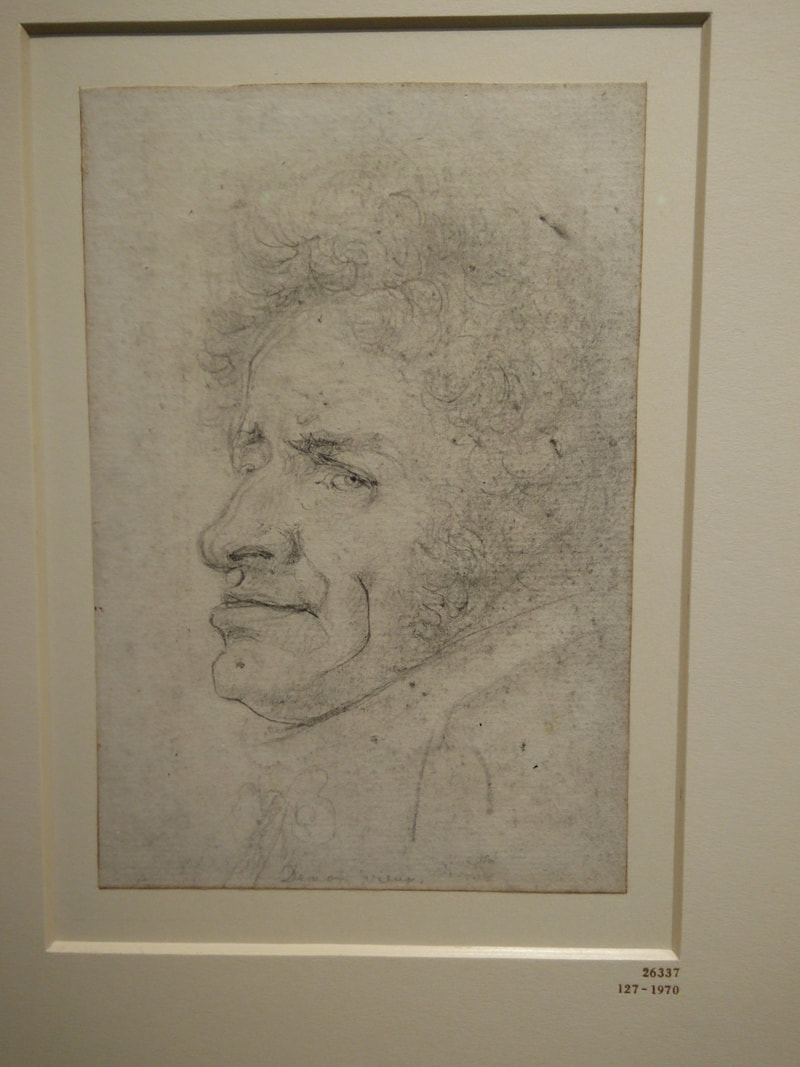
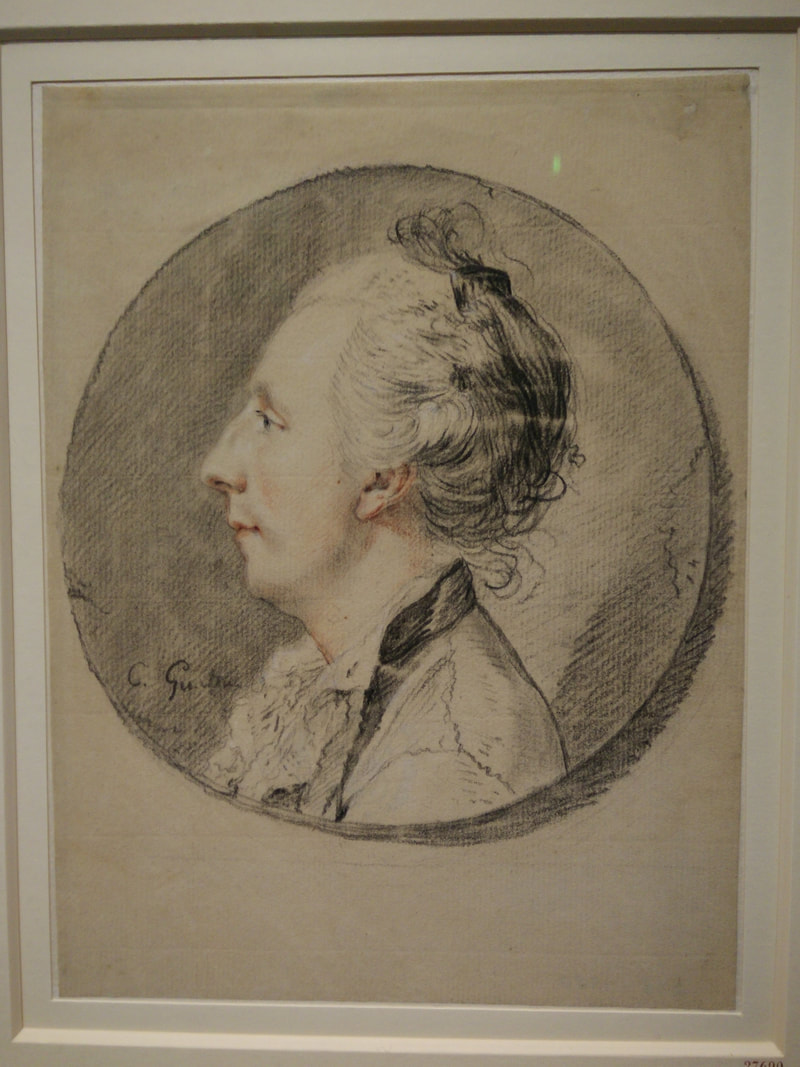
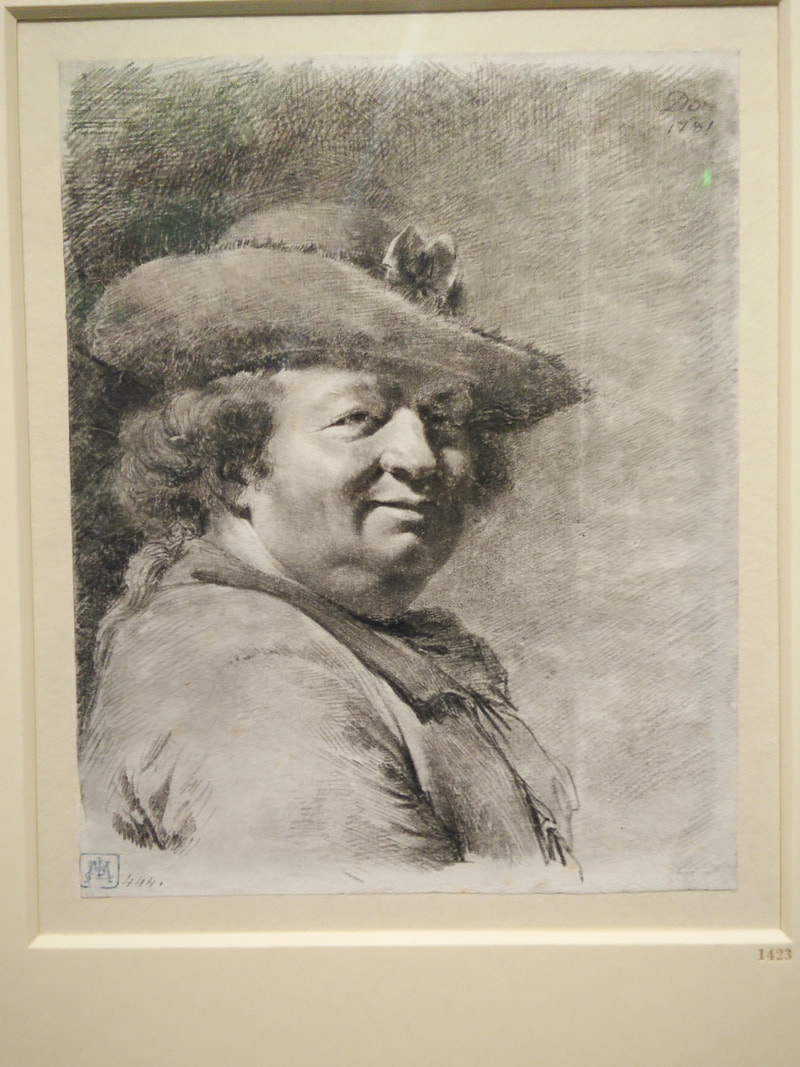
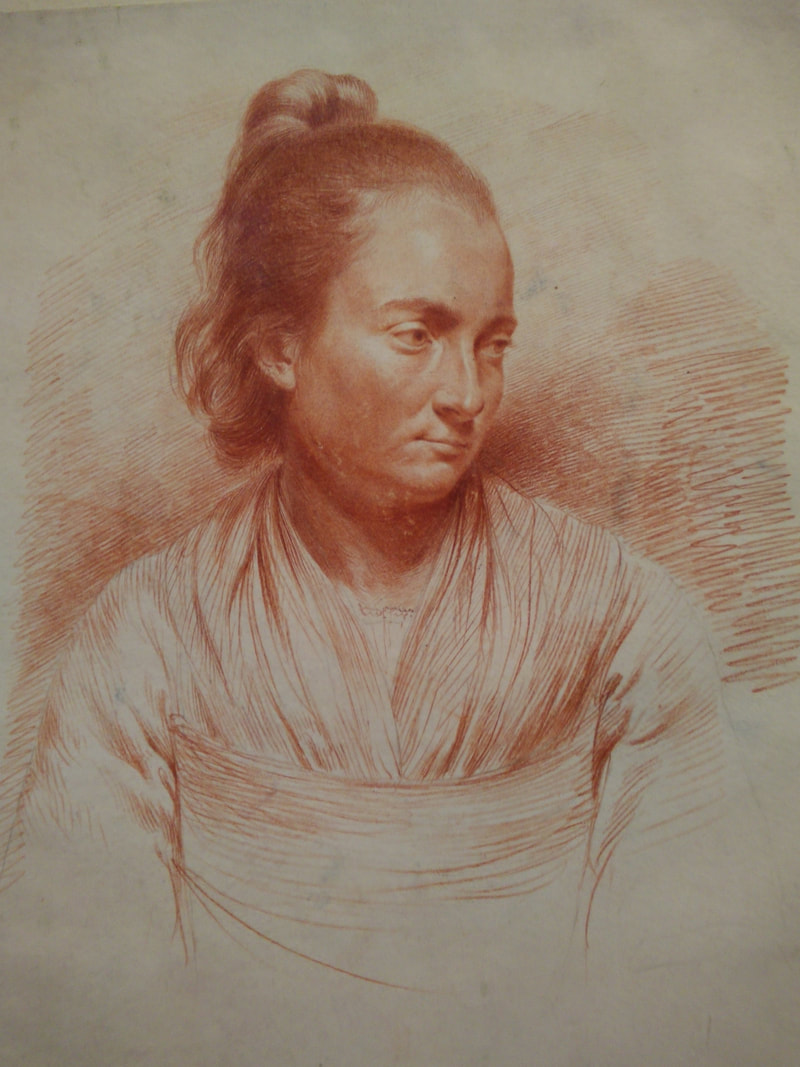
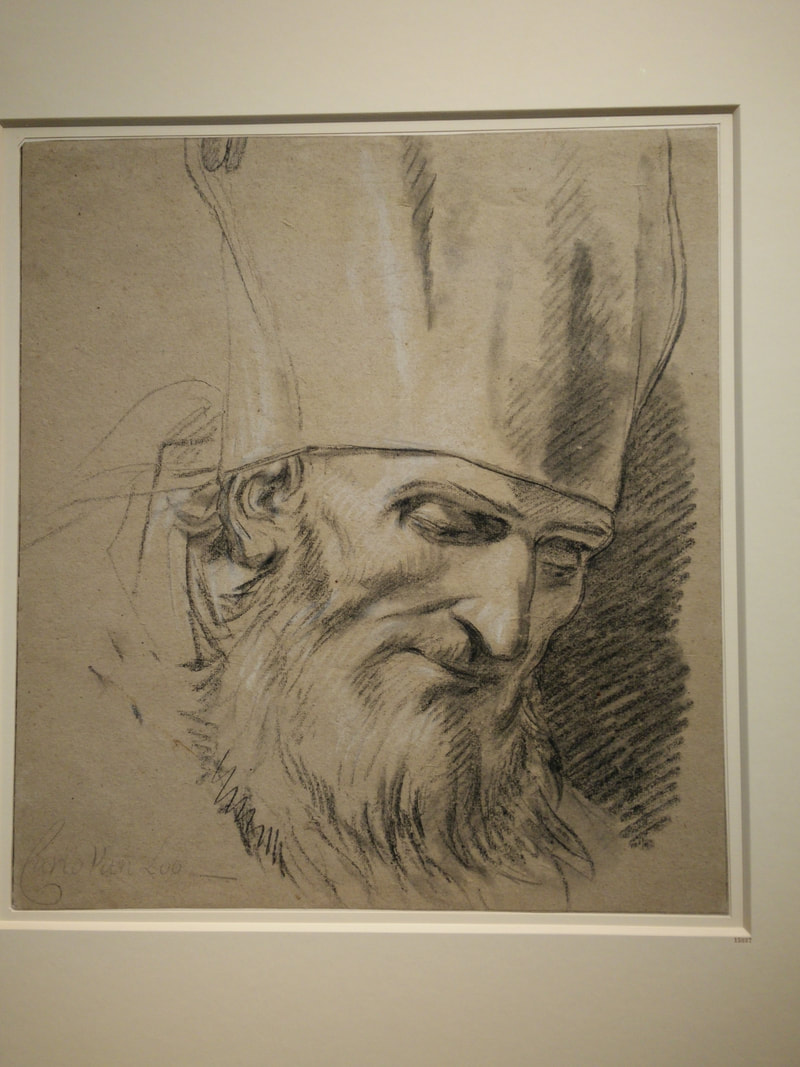
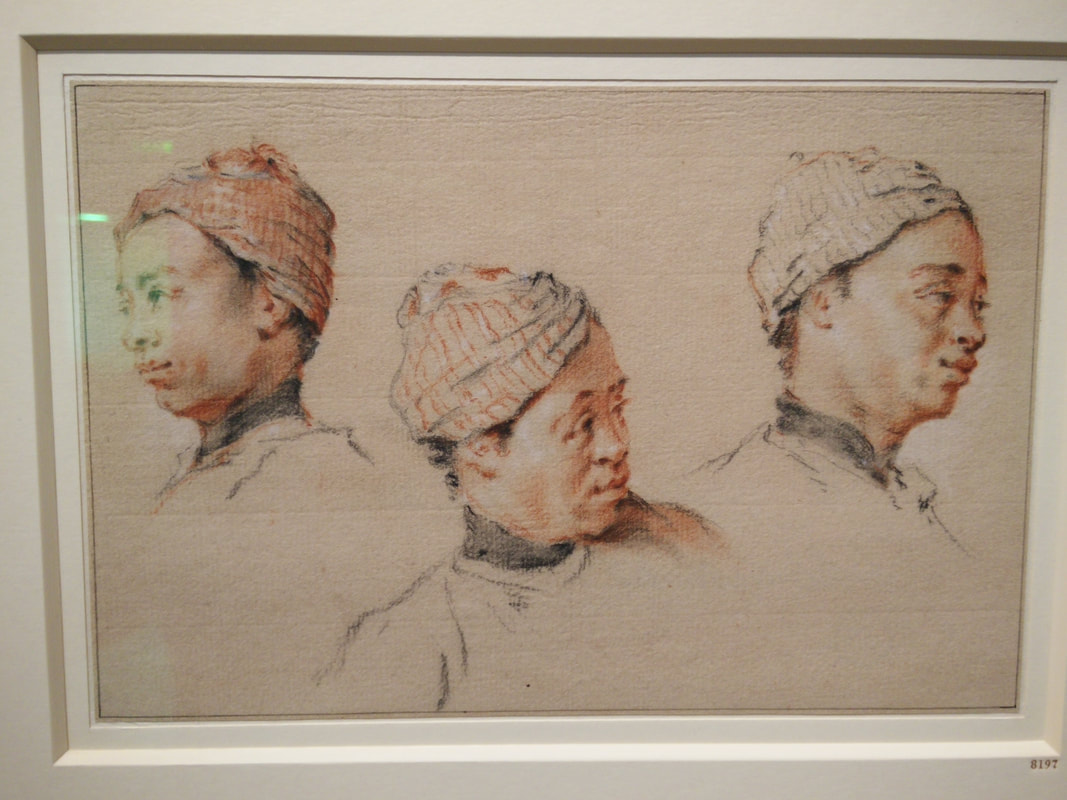
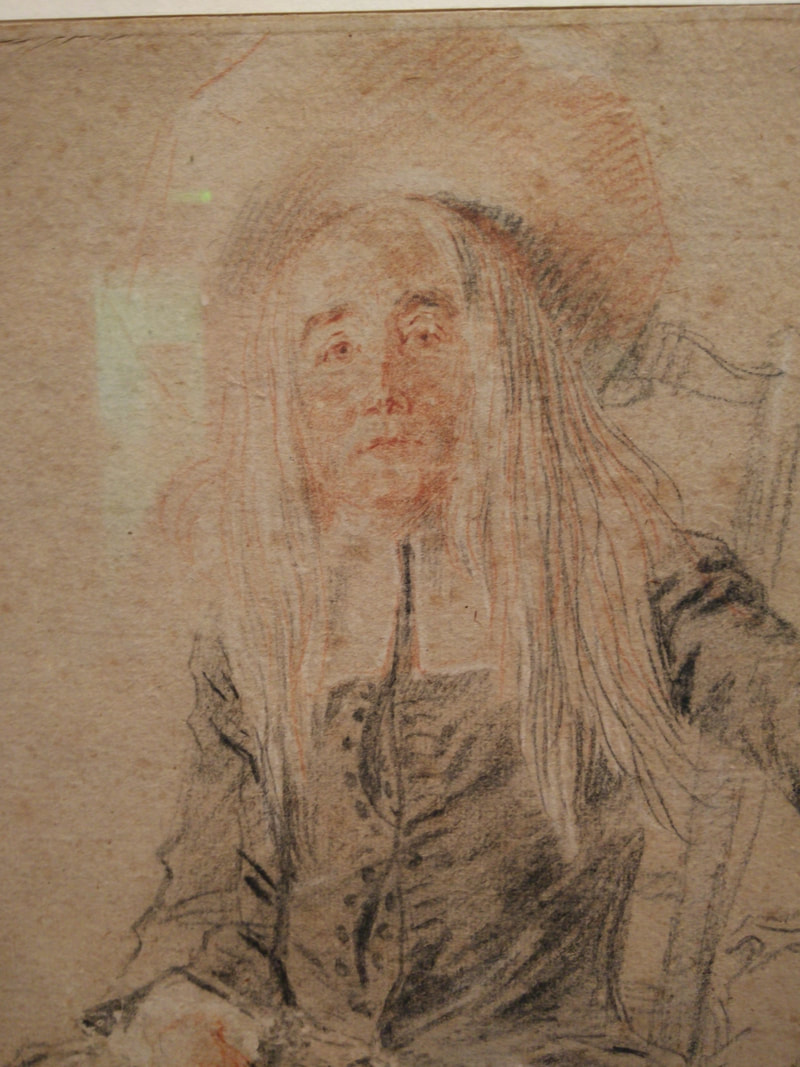
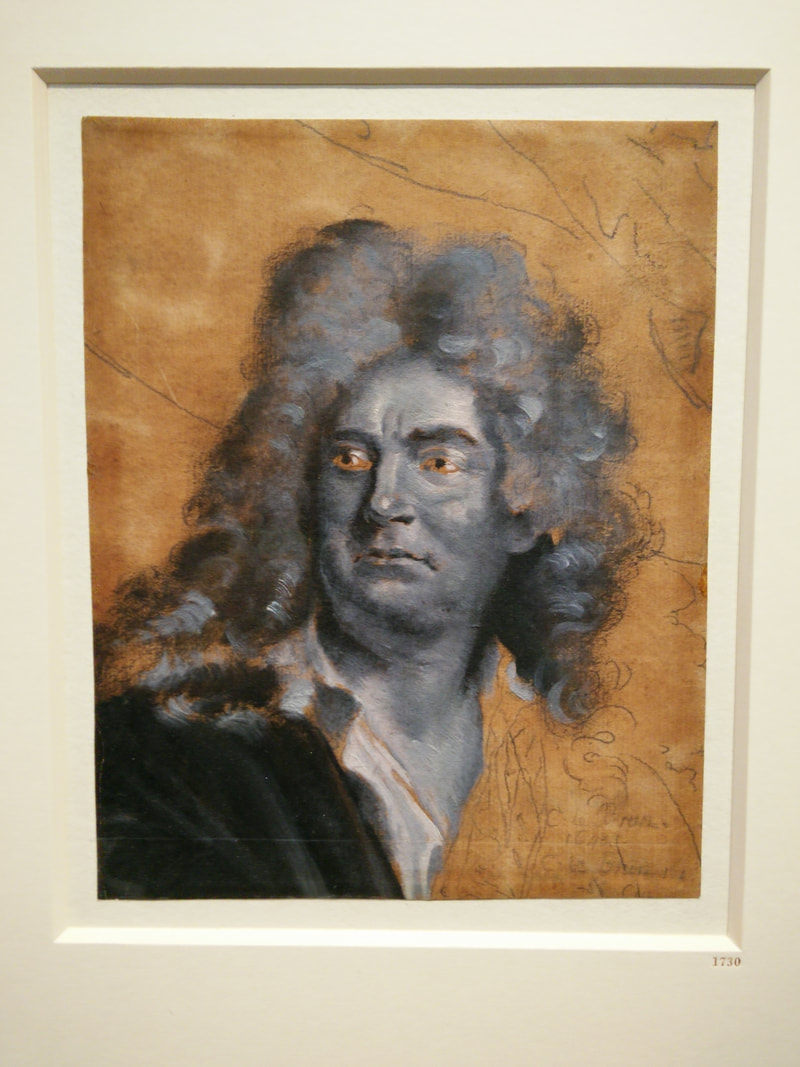
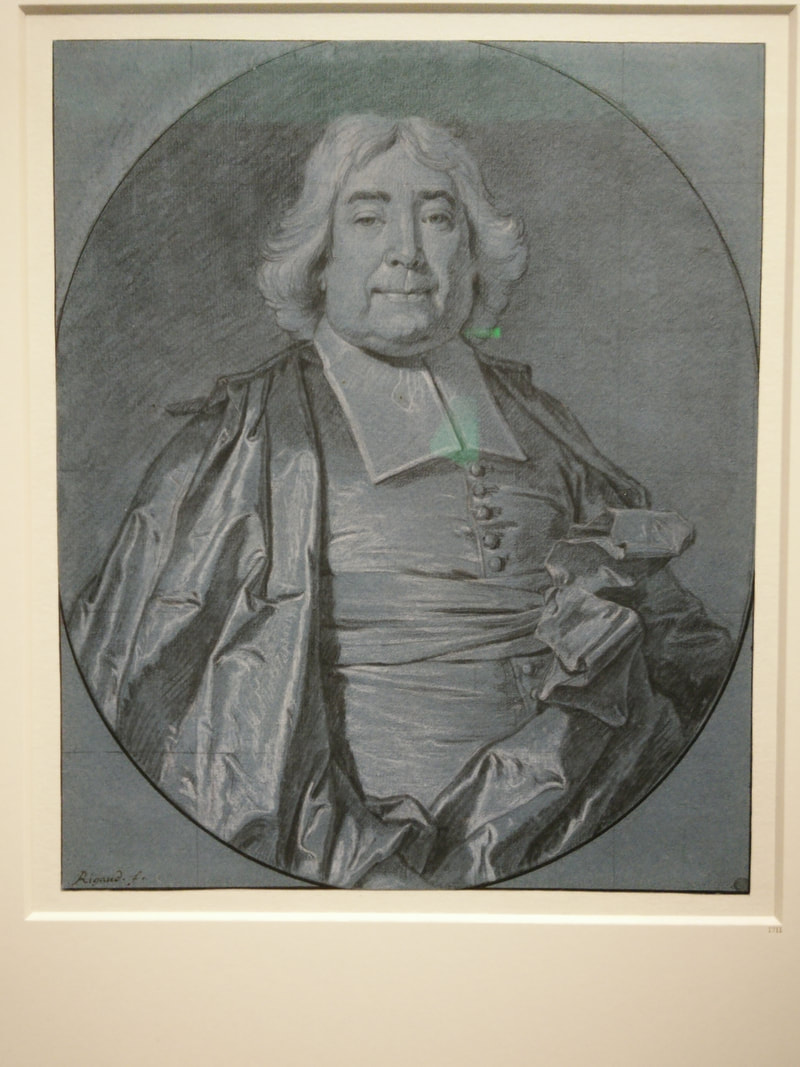
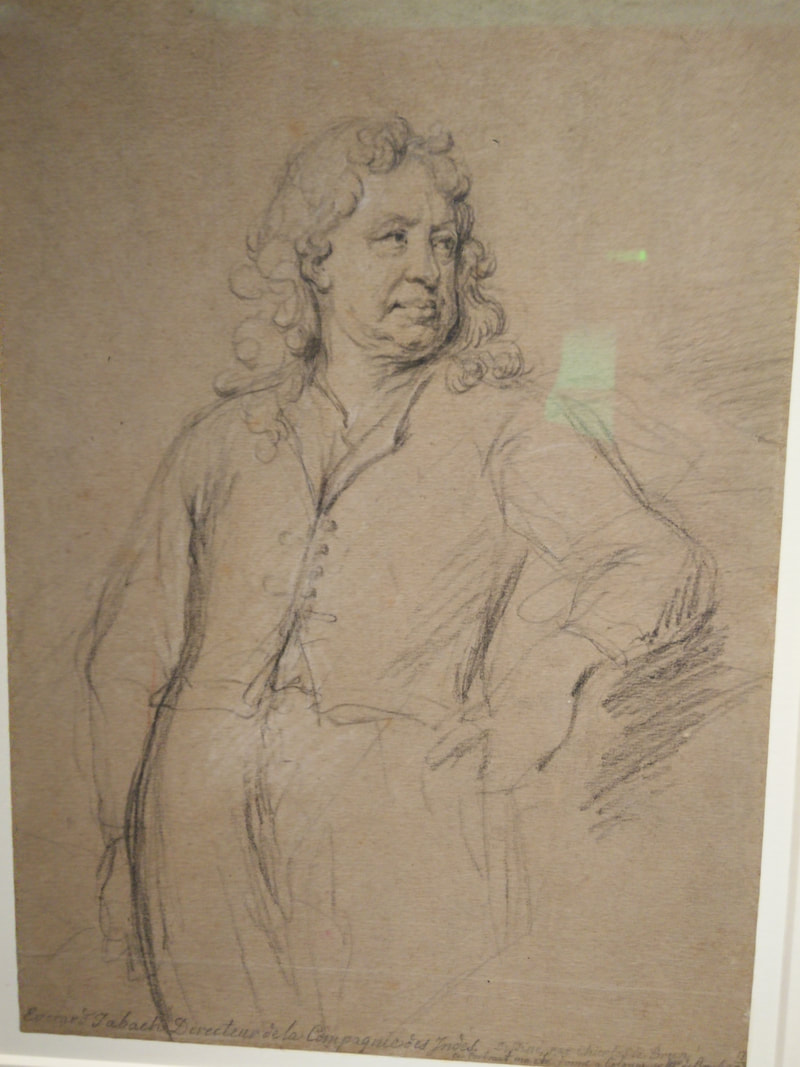
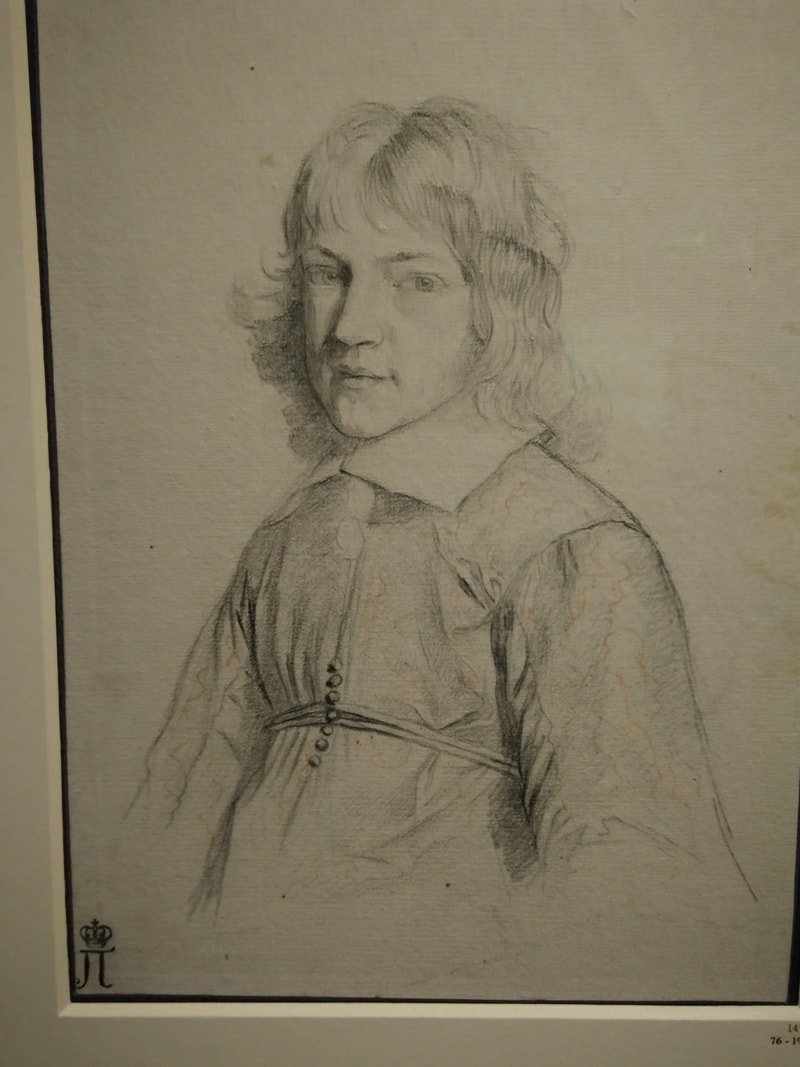
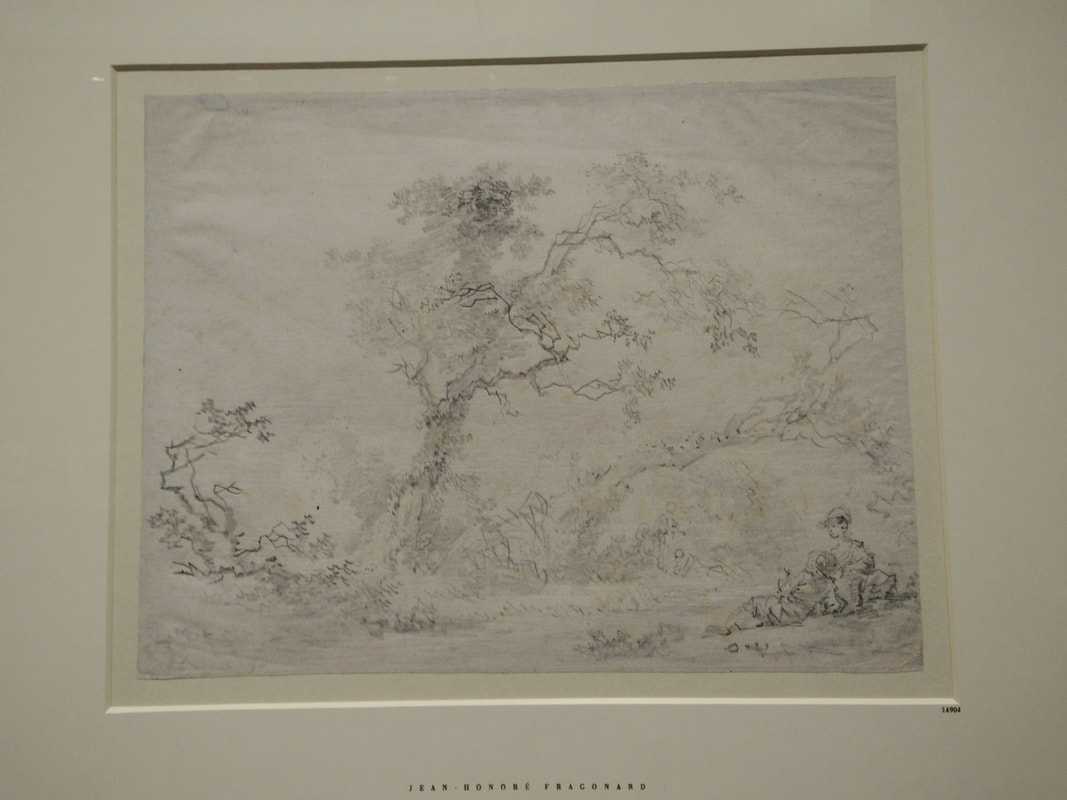
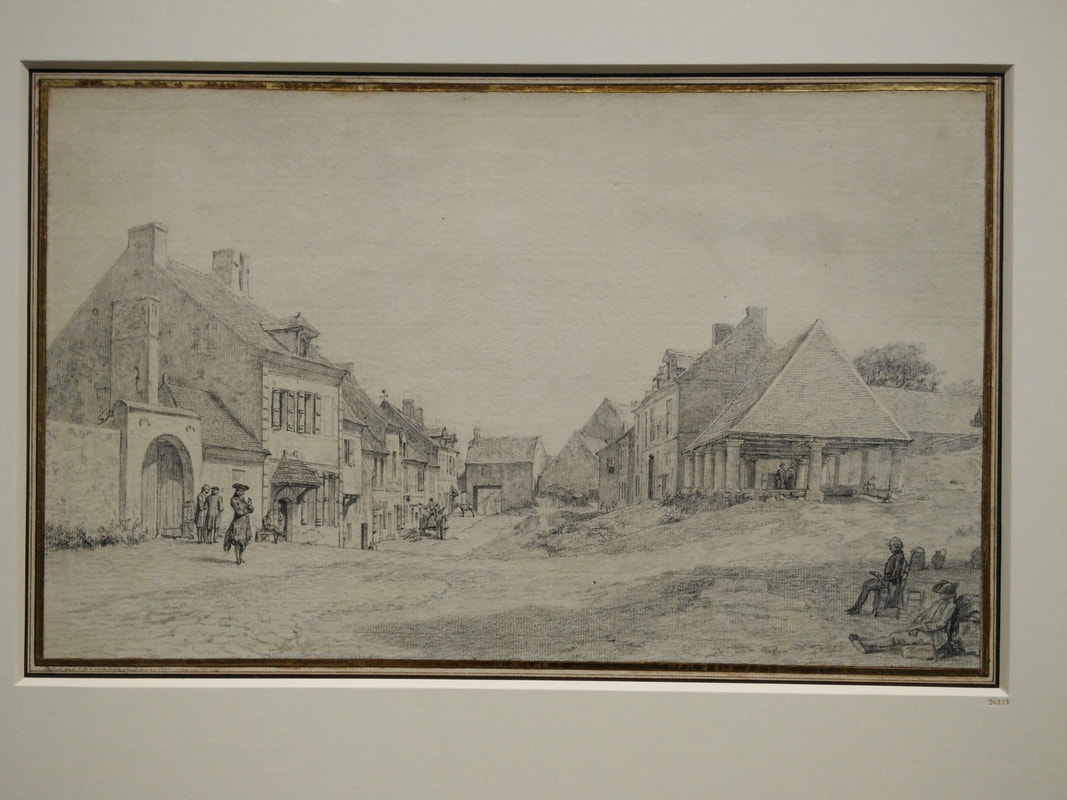
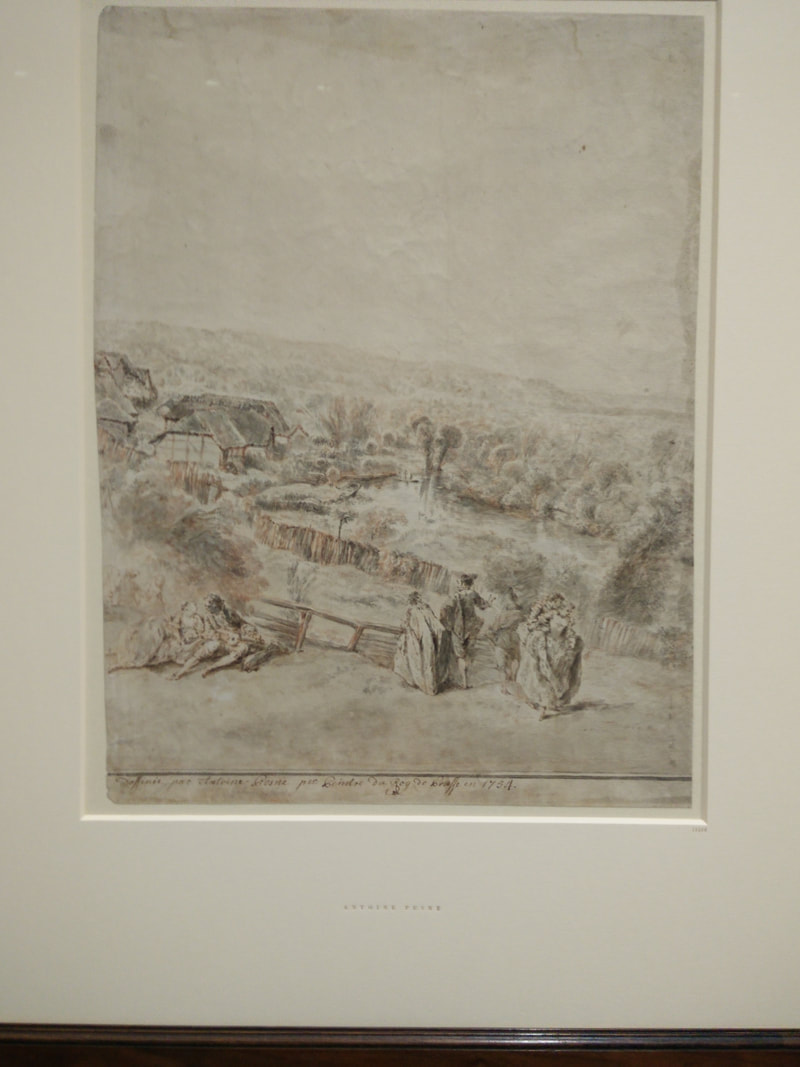
A good friend and I had the opportunity to go see a collection of drawings by French artists of the 18th century at the Kupferstichkabinett, close to Potsdamer Platz in Berlin. The collection will be on display for some more weeks, but not very long, so go and see it, if you have the chance. It is safe to say, that we were both blown away by what we saw. Below you can see an assortment of the drawings. Please only use them for studying purposes! They are usually being kept in the closely located library, which is free of charge and you can go there and study them closely. So since the museum shows them in the library for free for studying purposes, I guess it is safe to show them here as well. As being said, only for the purpose of learning from them. Things I learned from the drawings, or what fascinated me. Look out for this, to make the studying more purpose-driven and enjoyable. Because it is more fun to look for things you know are there, instead of not knowing, what you are even looking for. - they treat the lines they use for marking an edge differently, depending if it is in light or shadow. Lines that mark an edge in the light are lighter, sometimes even broken! This also connects the object with the background. - they describe the texture with their lines, using very different movements and patterns for the things they portray. - they use finer lines for things that are further back and thicker, darker lines for things on the foreground. - they used their lines to show the form underneath. - the contour lines are rarely closed off to all sides. Like I said, they usually kept the lines on the lit side of things pretty fine or broken. - they used line weight, meaning the line changed thickness from one end to the other. - the line weight was used to show if the line was in light or shadow. - they use a hierarchy for their lines, throughout their drawings.
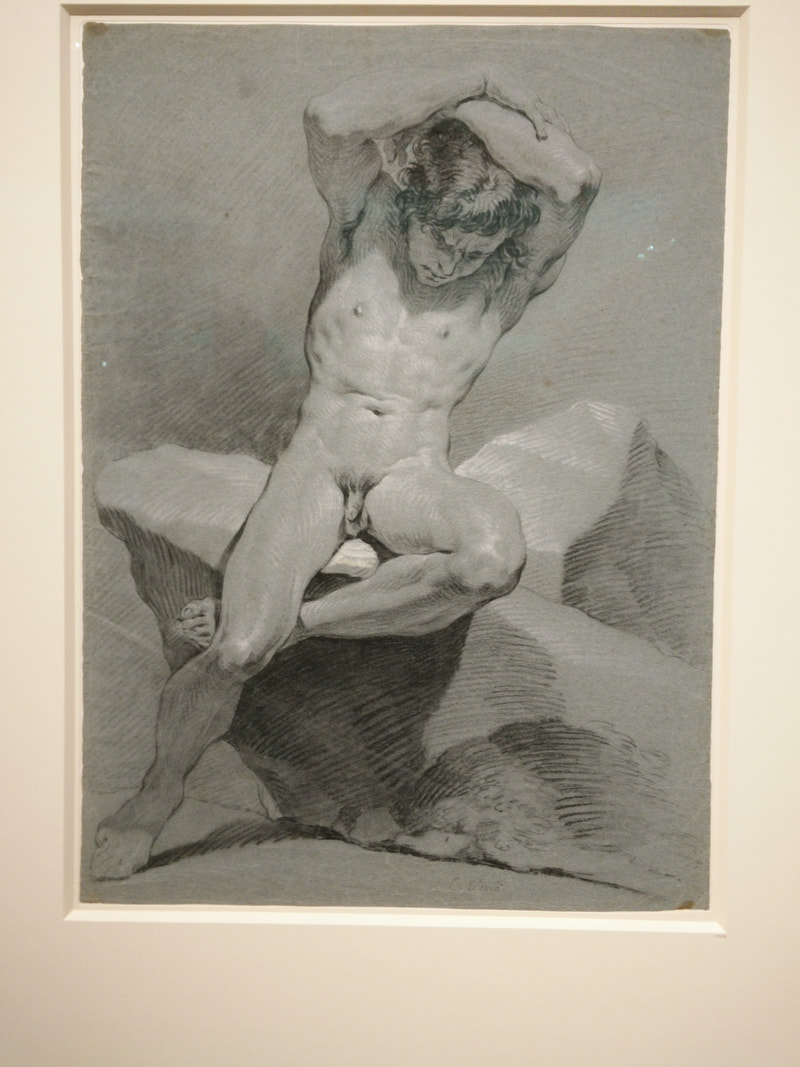
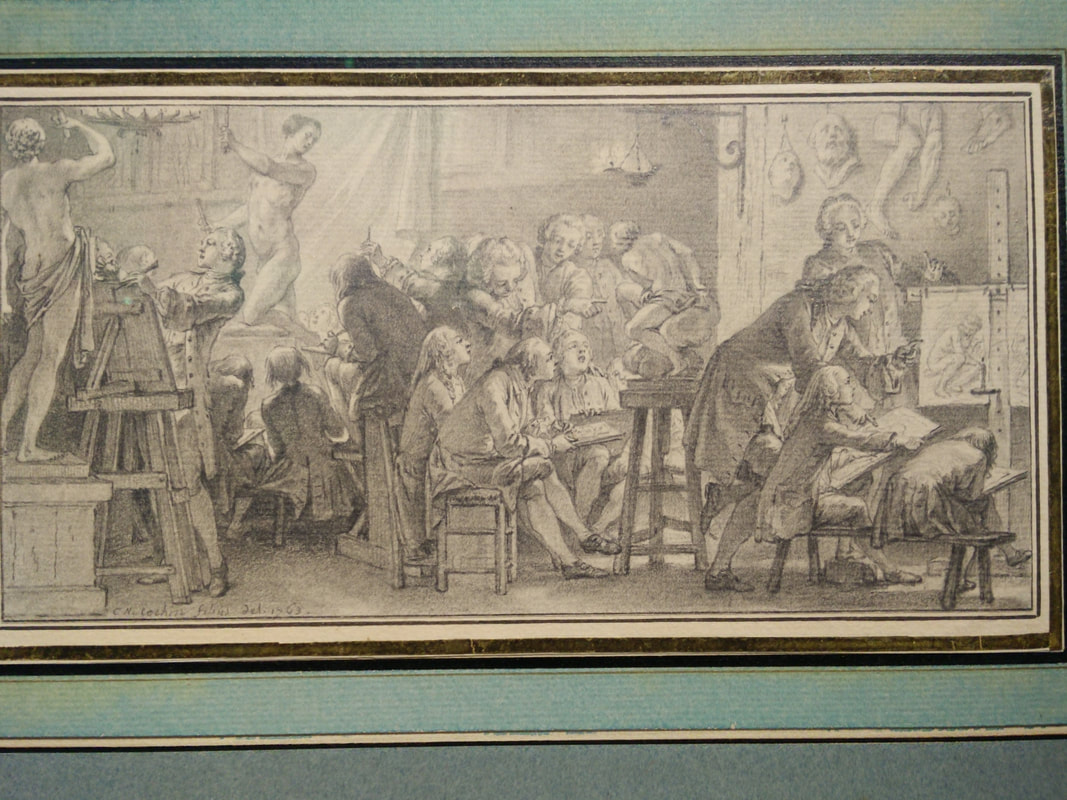
- even in their sketches, some of them used these principles. - they used line often to model something to look 3D. So even with using lines, by using this hierarchy, many of the drawings looked very realistic. Look for the nude male, who is sitting on a rock, leaning to the picture - right. On close examination you can see all the lines, but it still looks so real! What was so impressing to me, was that they all seem to use thess techniques. As if they all use the same language. A visual language of lines. But even with using this same language, they produced very different drawings and styles. So it is not restricting, to use this hierarchy. On the contrary, it still leaves you with an infinite amount of things to do with it. It is just that the result will be more realistic. One of the drawings showed an academy, where drawing was taught. Most interesting was that, it showed a step - by - step approach, to learning this line - language. Step 1: analyse drawings by looking at and copying them. This way, you get to know the language and see how they used it. Once you have learned the language and practice it, you can go on to step 2. Step 2: make drawing of casts and used the line - language, you have learned before. Step 3: make drawings of life - models, again using what you learned. It was very interesting, to see this step - by - step approach. To proceed to step 2, without understanding step 1 seems like a bad idea. I hope this doesn't sound pretentious. I am by no means a professional drafts-man, I just hope to help some beginners by sharing these theoretical insights. After overloading our brains with all of these insights, we went to the Alte Museum, which is located on the Museumsinsel in Berlin. Having a year - pass for all the museums is such a blessing! We then went on to use those principles in a study. I really had to concentrate and it was getting late and dark (the statue I drew wasn't lit, for whatever reason). But in the end, I was quite happy with the result. 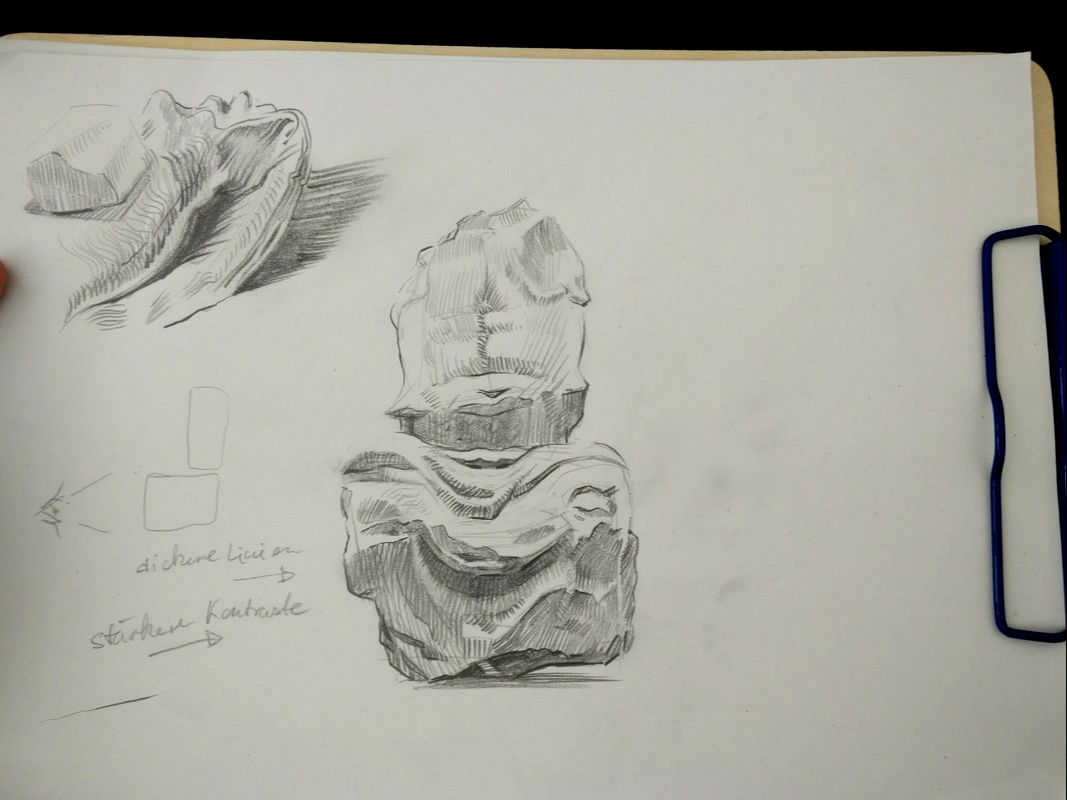
0 Comments
I know this has been discussed before and I am not the best, when it comes to studying-practices. But I still wanted to share my latest findings. I have come to realize that there is a inherent hierarchy, when it comes to practicing the micro-skills, that make up the macro-skill of doing art. These micro-skills are: Line weight Tone Proportion Silhouette Light Shadow Design Concept Form Composition Color Value Source: www.mrjakeparker.com/blog/10000minutes There are definitely more, but for me, this is sufficient. Also, each of them has sub-categories (i.e. Hue / Chroma / Temperature ... when it comes to color). The hard part is to juggle them all, when making a painting. I know I have struggled a lot through paintings, because I tried to do 2 or more things at the same time. So instead now I am trying to focus on each micro-skill and train it seperated. This is one aspect of something that is called "deliberate practice". You can read about it here: www.amazon.com/Peak-Secrets-New-Science-Expertise/dp/1531864880 So in order to get better at composition, I went to the museum and made small (ugly) simplifications of the master-pieces that were on display there. After doing these simplifications I tried to find hidden structures beneath the painting, as you can see on the sketch und the lower middle. It was super-fascinating to find these hidden lines and rhythms. 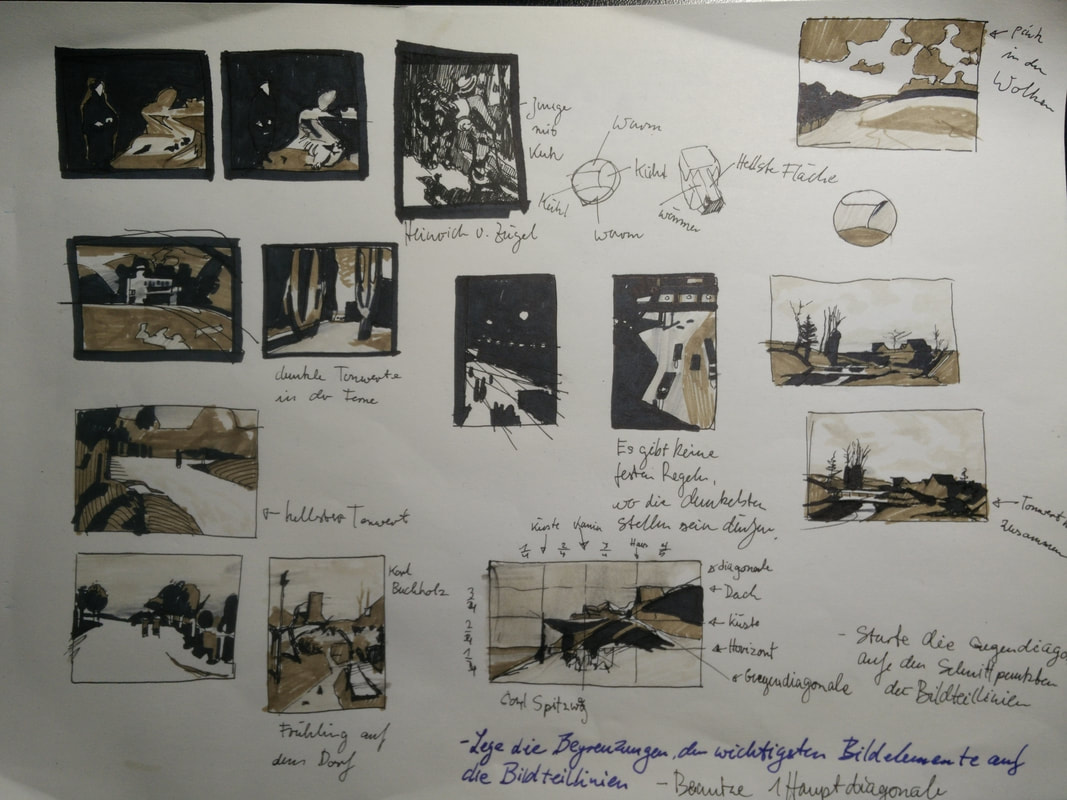 After seeing them and understanding the grid the artist used, I could then use it in my own work. I know these sketches are really basic. But it is this basic stage, that I neglected before and that made me struggle through the paintings a lot. 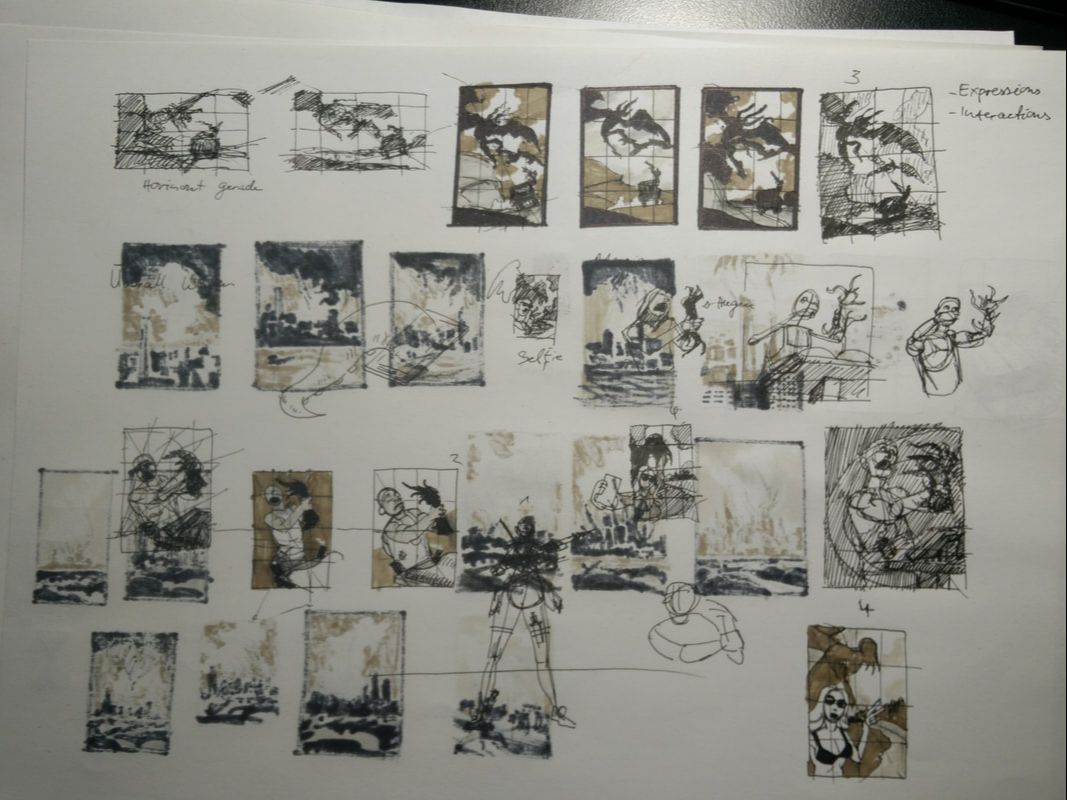 The thing that really helped me get the most out of these studies, wasn't trying to get everything correct, but to focus on the thing I needed to learn. That way I could do more smaller studies and find those hidden principles or micro - skills that the artist used to create their master - piece.
Before I did photo-copies, where I wanted to get everything exactly as in the source. I now realize that I was training too many micro-skills at the same time, which made growing my skill slower than it had to be. Please tell me in the comments, if you are struggling with studies a lot or if you had a moment where you found a similar way of practicing. This is my entry to January's Character Design Challange, which is held monthly on Facebook. Following what I had learned in the Character Design Course I am taking, I started with the pose and a lot of sketching. It took a while to figure out the proportions of the character, since I wanted it to look cute, but not child-like. It was a lot of fun to do this and I really feel like, I have learned a lot this year already. 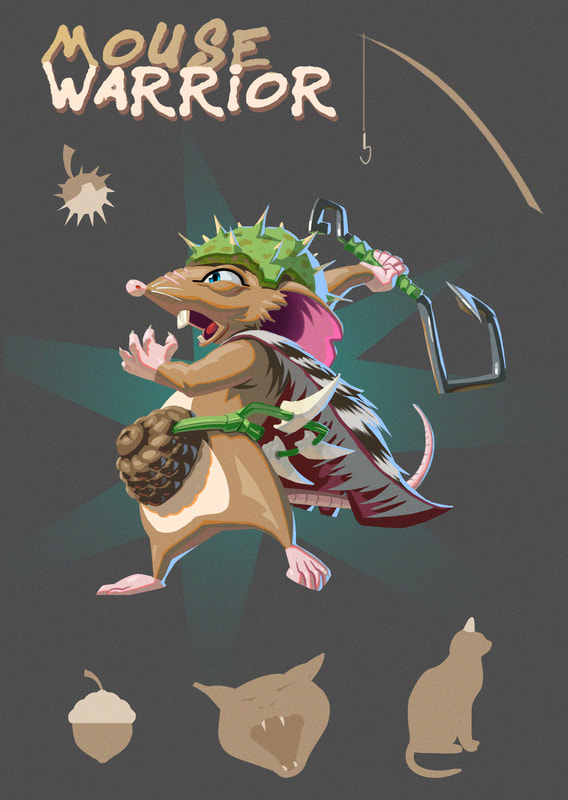 |
This is my blog. I will share information about workflow, my insights into image-making or just general thoughts and rants about being an artist. Archives
February 2024
Categories |


 RSS Feed
